Some analog points have different types of alarm limit to those mentioned in this guide. For example, the range supported by some analog points is Underrange to Overrange, rather than Zero Scale to Full Scale. The Procedure for Configuring an Analog Point’s Limits is typically similar, regardless of the type of limit. The driver guides explain any limits and configuration differences that are driver-specific.
If supported by the drivers on your system, you can optionally configure any of an analog point’s limit values (typically High High, High, Low, and Low Low) to change at different times of the day or week.
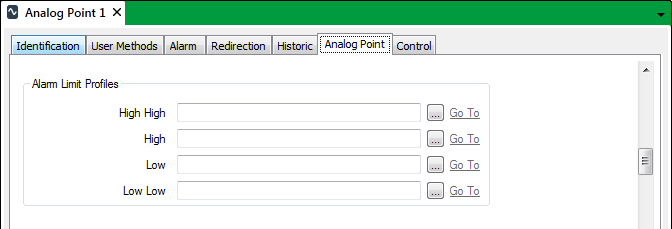
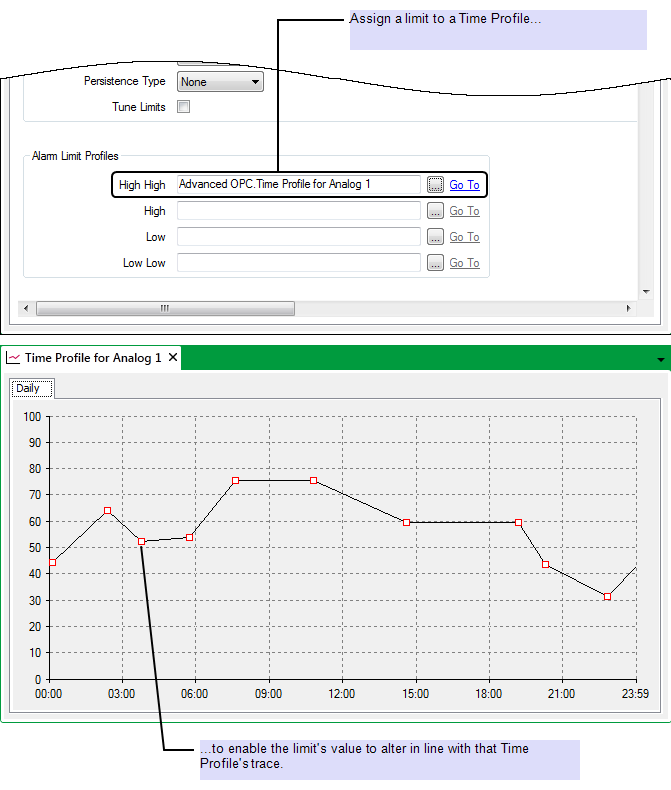
To do this, you assign a Time Profile to the relevant limit(s), using fields within the Alarm Limit Profiles section of the Analog Point tab:

For each limit for which the value is to alter, select that limit’s browse button. A Reference browse window is displayed. Select the required Time Profile from the window. The specified Time Profile:
- Must be of the appropriate type (for instance, a Double Time Profile, containing IEEE double-precision floating point 64-bit values)
- Must not cross any of the point’s fixed limits
- Must not cross over any other Time Profiles that are assigned to the point
- Must use a compatible scale (for instance, an inverted scale if the point uses such a scale (a point that has an inverted scale has a Full Scale that is less than its Zero Scale)).
Be aware that editing a Time Profile that is already assigned to an analog point might invalidate one or more of the above rules.
You should also ensure that the Time Profile is configured to use a suitable Time Zone (for instance, ‘Local Time with Daylight Saving Time’, for a Time Profile that changes a point’s limits during working hours).
Diagnostic message(s) will indicate if a Time Profile’s configuration conflicts with the point’s configuration (for example, if the profile's value exceeds that of another alarm limit).
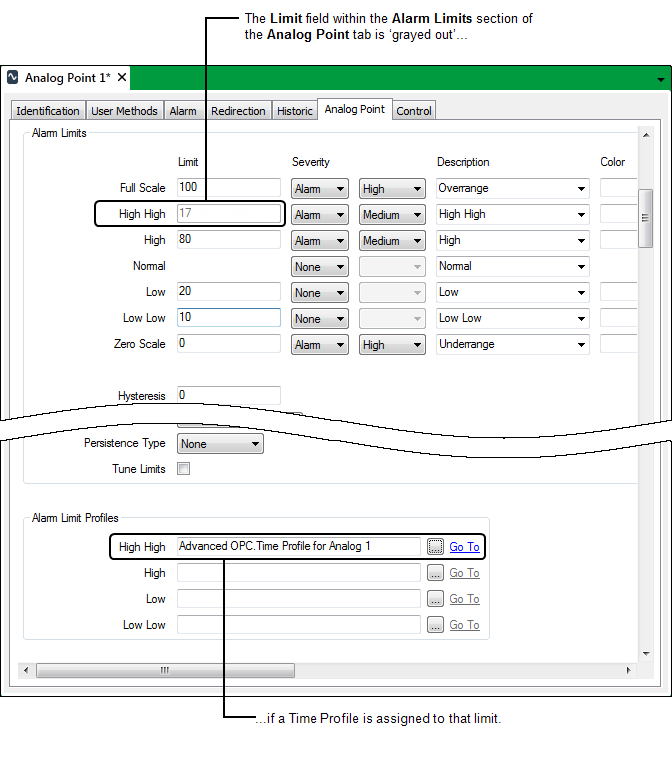
When a Time Profile is specified for a limit, the corresponding Limit field in the Alarm Limits section of the tab is ‘grayed out’ and unavailable for use. ClearSCADA ignores any configuration in this ‘grayed out’ field and instead uses the Time Profile to ascertain the limit’s value at any given time. You still use the Severity, Description, and Color fields adjacent to the ‘grayed out’ Limit field, to specify the rest of the limit’s properties (see Configure the Limits for an Analog Point).

Whenever the point’s data is displayed as a Current Trend or Historic Trend, any Time Profiles that are assigned to the point are displayed on the Trend instead of the alarm limits that they replace.
Be aware that you cannot tune any limits that are assigned Time Profiles. (Such limits are not displayed in the Tune Alarm Limits window when the Tune Alarm Limits action is selected.)
For any limit(s) that are to remain fixed, ensure that the corresponding field(s) within the Alarm Limit Profiles section of the Analog Point tab are left blank. For such limits, ClearSCADA processes the point’s data using the values that are specified for those limits in the Alarm Limits section of the tab.
Example:
The High High limit of a particular analog point is assigned to a Daily Time Profile. The Time Profile’s value determines the value of that limit at any particular time throughout the day.
In this example, the High High limit is set to 95 until midday, whereupon the value rises. The Time Profile’s trace shows that the limit’s peak value of 98 occurs during 18:00 to 21:00, after which the value gradually falls back to 95.

Further Information
Configuring Time Profiles in the ClearSCADA Guide to Core Configuration.
Produce a Profile Based on Historic Data in the ClearSCADA Guide to Core Configuration.