and View the Backup Status on a Mimic
This example shows how to configure Geo SCADA Expert to:
- Schedule a backup
- Create a Mimic so that you can view the progress of a backup.
The backup will run on your Main server. You need to set up the folders that you refer to in the backup settings on all the servers that might become a Main server.
The file names and file path names in the example below are for illustrative purposes only. You will need to use file names and paths that are appropriate for your system.
Example:
In ViewX, you create a Backup item called 'Server Backup'. It has the following settings:
- In Service: Enabled
- Severity: High
- Default Parent Directory: C:\ClearSCADA\Backups
- Default Destination: Backup_%Dyyyy-MM-dd%
You should use destination settings that will create unique backup folders each time that the backup is run. The backup will fail if you set the destination to the same or repeating folders. For example,
Backup_%Dddd%will create backup folders for each day of the week:Backup_mon, Backup_tue and so on.
This allows for seven backups folders to be created for the first week, but the backups will not work for subsequent weeks unless the folders are removed.
- Trip Sequence Time: NOW
- Database: Enabled
- Registry: Enabled
- Historic Files: Disabled
- Historic Data: Enabled, Start Offset: Hour -2 Months, End Offset: Hour
- Alarm Summary: Disabled
- Event Journal: Disabled
- Configuration Changes: Disabled.
The Backup item is saved. When this Backup is triggered, it will make a backup of the database and the ClearSCADA (Geo SCADA Expert) registry settings. It will also back up historic data (starting from 2 months before the start of the current hour and ending at the start of the current hour). The backup will be stored in a new folder named 'Backup <date>' , where <date> is a reference to the date on which the backup was created, for example, Backup_2016-01-25. The Backup <date> folder will be stored on the c:\ drive in a folder named 'ClearSCADA\Backups'.
A new Schedule item called 'Backup Daily' is created. The following settings are configured on the Schedule's Properties Form:
- In Service: Enabled
- Type: Daily
- Time Zone: Local Time with Daylight Saving Time.
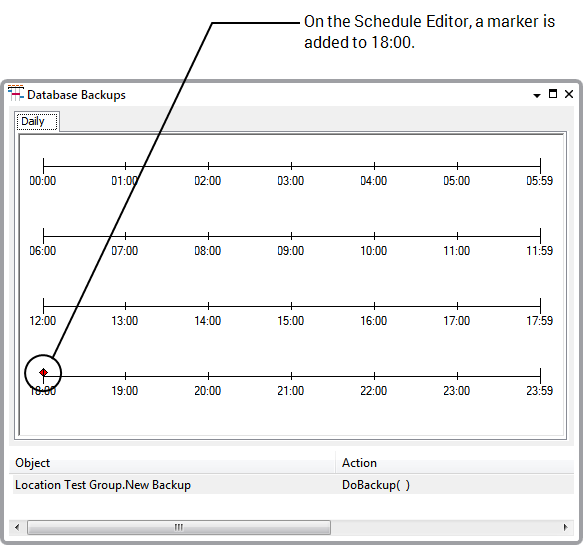
The Schedule Editor is displayed and the 'Server Backup' item is dragged from the Database Bar into the Action Area.
On the Add Action window, the Method is set to Backup. The Arguments for the backup (the Parent Directory and Destination) are taken from the configuration of the Backup item automatically, so are not adjusted on the Add Action window.

The Schedule Editor is saved. The Backup will now be triggered at 18:00 every day. A new backup folder will be created for each day.
A Mimic is configured to contain dynamic data for the Backup item. When a backup (for the item) is underway, the Mimic will show a progress bar that updates automatically. The bar will extend from 0 to 100% in size for each phase of the backup. A text box on the Mimic is configured to show which phase is currently in progress.
To create the Mimic, the following Mimic objects are created:
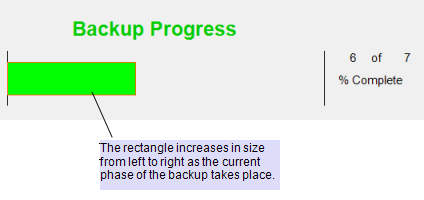
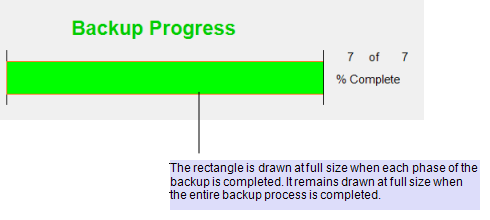
- Rectangle —This rectangle is the progress bar and it will extend from left to right as the backup proceeds through the various phases. At the end of the backup, the progress bar will be fully extended.
The rectangle is configured to have the following animations:
SizeDir: 4
This instructs the rectangle to increase in size horizontally, from left to right.
SizeMax:100
The rectangle will be at 100% of its drawn size when its SizeVal is 100 or more.
SizeMin: 0
The rectangle will be at 0% of its drawn size when its SizeVal is 0 or less.
SizeVal:".ServerBackup.Percent"(Fast Updates is enabled for this animation).
This animation associates the Percent property of the Server Backup item with the SizeVal property of the rectangle. During the backup, the Percent value will rise from 0 to 100 and so the size of the rectangle will increase proportionately. This increase in size will occur for each phase of the backup process.
- 'Phase' Text Boxes—Three text boxes are added to the Mimic:
- Text Box 1 is configured to have its Value property animated by the CurrentPhase property of the 'Server Backup' item. This sets the text box to display the number of the phase that is currently in progress (when a backup is taking place).
- Text Box 2 is configured to contain static text: of
- Text Box 3 is configured to have its Value property animated by the NumPhases property of the 'Server Backup' item. This sets the text box to display the total number of phases in the backup process.
The three text boxes are positioned next to each other, so that in Run mode, the Mimic will show:
<Current Phase> of <Total Number of Phases>
- 'Label' Text Boxes—A text box containing 'Backup Progress' and a text box containing '% Complete' are added to help users understand the purpose of the Mimic.
- Lines—Vertical lines are added to indicate the start and end of the rectangle (when drawn at 100% its intended size).
A user displays the Mimic in Run Mode just before the scheduled time for a backup (13:00 on daily). When the backup begins, the rectangle starts at 0 and then increases in size (from left to right) as each phase of the backup progresses. The amount of time this takes depends on the amount of data being backed up. (The bar may appear at 100% almost instantly if only a small amount of data is being backed up).


Note that phases 1-4 inclusive can complete very quickly. With larger backups, phases 5 onwards may take longer to complete.
Further Information
Schedules: see Using Schedules to Automate Regular Functions
Mimics: see the Geo SCADA Expert Guide to Mimics.