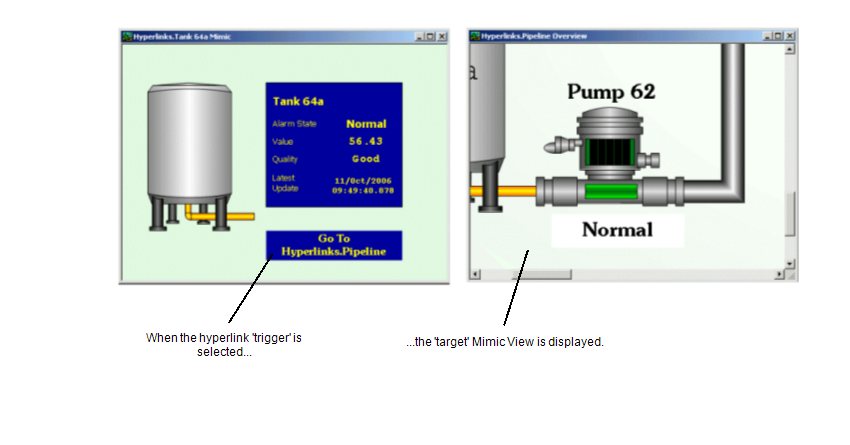
You can create a hyperlink to a Mimic view (a specific area of a Mimic shown at a defined level of magnification). This is useful when you need to provide hyperlink to information shown on a specific part of a Mimic rather than the entire Mimic.
To create a hyperlink to a Mimic View:
- Display the Mimic that is to contain the new hyperlink. You need to display the Mimic in Design mode (see Displaying a Mimic).
- Use one of the following methods to configure the hyperlink:
Drag and Drop:
- Display the Database Bar (see Display an Explorer Bar).
- In the Database Bar, select the 'target' Mimic's icon, then drag it onto the Mimic display.
When you release the mouse button, a context sensitive menu is displayed. - Select the Hyperlink option to add a text box to the Mimic.
The text box is automatically configured to act as a 'trigger'—when it is selected, the 'target' Mimic will be displayed. - Right-click on the 'trigger' text box that you created in step ii.
A context sensitive menu is displayed. - Select the Animations option to display the Animations window.
- On the Animations window, select the PickParam property, then select the Edit button to display the Expression window.
- On the Expression window, add the following to the expression:
+'#View="<ViewName>"'
Where <ViewName> is the name of the Mimic View to which you want to link. Do not enter the angle brackets < >.
For example, if you want to link to the 'Pump62' View on a Mimic named 'PipeLine Overview' you would change the expression from:
".Pipeline Overview.ObjectLink"
to:
".Pipeline Overview.ObjectLink"+'#View="Pump62"'
- Select the OK button to confirm your entry and close the Expression window.
- Select the Close button to confirm your alterations and close the Animations window.
- Edit the text box as required (see Editing a Text Box), then proceed to step 3.
Pick Action Wizard:
- Right-click on the Mimic object that is to act as the 'trigger' for the hyperlink. If the Mimic does not yet contain the object that is to act as the 'trigger', you should add the object then right-click on it (see Adding Objects to a Mimic).
When you right-click on the Mimic object, a context sensitive menu is displayed. - Select the Pick Action Wizard option to run the Pick Action Wizard.

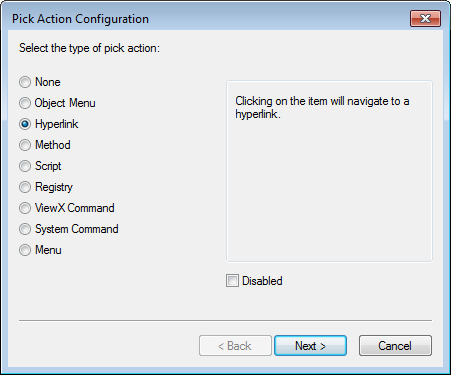
- Use the first 'page' of the Pick Action Wizard to set the type of pick action to Hyperlink, then select the Next button.
- Define the URL of the 'target' Mimic (for more information, see Using the Pick Action Wizard to Create a Hyperlink).
- When you have defined the URL, add the following to the end of the URL address:
#View="<ViewName>"
Where <ViewName> is the name of the Mimic View to which you want to link. Do not enter the angle brackets < >.
For example, if you want to link to the 'Pump62' View on a Mimic named 'PipeLine Overview' you would change the URL from:
SCX:////CMimic/.Pipeline Overview
to:
SCX:////CMimic/.Pipeline Overview#View="Pump62"
- Define the Mode and Inset Position as required (for more information, see Using the Pick Action Wizard to Create a Hyperlink).
- Select the Next button.
- Define the ToolTip comment as required (for more information, see Using the Pick Action Wizard to Create a Hyperlink).
- Select the Next button.
- Select the Finish button to confirm the configuration and close the Pick Action Wizard. Proceed to step 3.
Animations:
- Right-click on the Mimic object that is to act as the 'trigger' for the hyperlink. If the Mimic does not yet contain the object that is to act as the 'trigger', you should add the object then right-click on it (see Adding Objects to a Mimic). When you right-click on the Mimic object, a context sensitive menu is displayed.
- Select the Animations option to display the Animations window.
- On the Animations window, select the PickParam property, then select the Edit button to display the Expression window.
- On the Expression window, add the following to the expression:
+'#View="<ViewName>"'
Where <ViewName> is the name of the Mimic View to which you want to link. Do not enter the angle brackets < >.
For example, if you want to link to the 'Pump62' View on a Mimic named 'PipeLine Overview' you would change the expression from:
".Pipeline Overview.ObjectLink"
to:
".Pipeline Overview.ObjectLink"+'#View="Pump62"'
- Select the OK button to confirm your entry and close the Expression window.
- Select the Close button to confirm your alterations and close the Animations window. Proceed to step 3.
- Save the Mimic.
The hyperlink will be available when the Mimic is displayed in Run Mode. When the 'trigger' object is selected, the 'target' Mimic View will be shown in the relevant window (defined by the type of hyperlink).
