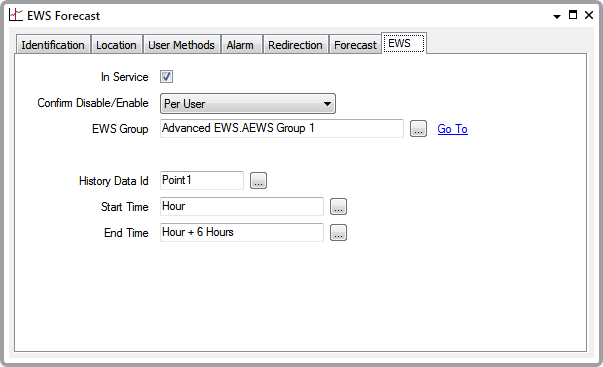
Use the EWS tab to define the EWS-specific properties for the Advanced EWS Forecast Item.

- In Service—Use to specify whether the forecast item is active or inactive (see Placing an Item In Service in the Geo SCADA Expert Guide to Core Configuration).
- Confirm Disable/Enable—Users with the required permissions can disable a forecast item that is In Service, or enable an item that is not In Service.
Use the Confirm Disable/Enable combo box to specify whether a confirmation dialog box is displayed whenever an operator requests that this point is disabled or enabled (see Requesting Confirmation of Action Requests in the Geo SCADA Expert Guide to Core Configuration).
- EWS Group—Use to specify the EWS Group that defines the interval at which the point data associated with this item is scanned. Select the browse button to display a Reference browse window, and select the required group from the window.
- EWS History Item Id— Use to specify History Data Id for the point from which data used for the forecast item is obtained. Select the browse button to display a Reference browse window, and select the required item within the Advanced EWS Server, from the window.
- Start Time—Use to specify the start time in relation to the present time for the data that you want to import into the EWS Forecast.
Enter the required interval in the OPC Time Format. You can enter the value directly in the field, or use the Interval window (accessed via the field's browse button) to specify the required value.
- End Time—Use to specify the end time of the period, for which you require data to be imported into the EWS Forecast.
Enter the required interval in the OPC Time Format. You can enter the value directly in the field, or use the Interval window (accessed via the field's browse button) to specify the required value.
ATTENTION: If these fields are left empty, this causes an unconstrained request to generate, which may impact on the performance of the system.
Enter the required interval in the OPC Time Format. You can enter the value directly in the field, or use the Interval window (accessed via the field's browse button) to specify the required value.