From Geo SCADA Expert 2019 onwards:
- The location from which the REGISTRY function retrieves a value varies, depending on the type of client from which the function is triggered and the user that is logged onto that client. With ViewX and Virtual ViewX clients, the value is now stored in the registry of the User Account database item that is associated with the logged on user.
- You can use the REGISTRY function if you are accessing the database as the Guest User or Super User, but with such users the value is only retained during the logged in session. These User Accounts do not retain and store the value.
For more information, see REGISTRY.
You can animate a symbol object to write a value to the registry when it is selected. The value in the registry can then be used to filter an embedded List, show or hide another object and so on in the same way that a registry value is used on a 'normal' Mimic.
To explain how to use the Registry type of pick action with a Symbol object, we are going to guide you through an example. As you perform the steps in the example, you will create a button that will write a value to the registry when it is selected. For the example, selecting the button will apply a different filter to an embedded List.
When you have performed the steps in the example, you will be able to adapt the procedure to meet your own requirements.
Example:
This example assumes that you have a folder named OS Reg that contains Modbus points that are associated with outstations named Modbus Outstation 1 or Modbus Outstation 2. If the Advanced Modbus driver is not installed, you can replace the references to Modbus points with a different type of point (you will need to enter a suitable source entry and registry values).
To animate a 'button' on a Symbol to write a value to the registry:
- Create a new Mimic and enter a suitable name for it. This Mimic is going to be the 'button' symbol.
- Edit the Mimic.
- Draw a rectangle on the Mimic. Use the shading and color effects to alter the appearance of the button as required.
- Add a text box to the Mimic. Size the text box so that it is the same size as the rectangle and position it over the rectangle.
- Set the Fill of the text box to None so that it is transparent.
- Define a suitable color for the Pen and use the Font tab to define suitable settings for the text.
- Select the Graphics tab on the ViewX ribbon.
- Select Parameters in the View command group to display the Parameters window.
- Add the following parameters:
- BoxText
- Registry
- RegistryKey
The BoxText parameter represents the text that will be shown in the text box, the Registry parameter represents the value that is written to the registry, and the RegistryKey represents the name of the registry key.
You can leave the default settings for the Hint and Default Value of each parameter.
- Display the Animations window for the text box.
- Define these animations:
- PickParam—Enter the following expression:
"Parameter:RegistryKey" + '("' + "Parameter:Registry" + '")'
- PickType—8
- Text—Enter the following expression:
"Parameter:BoxText"
These animations mean that when an embedded version of the Symbol is selected, the value defined in the embedded Symbol's Registry property will be written to the registry. Similarly, the value that is defined in the embedded Symbol's Text property will be shown in the text box.
- PickParam—Enter the following expression:
- Close the Animations window.
- Save the Mimic.
- Create a new Mimic. Again, enter a suitable name for the Mimic. This Mimic is going to contain an embedded List and two versions of the 'button' Symbol that will apply different filters to the embedded List.
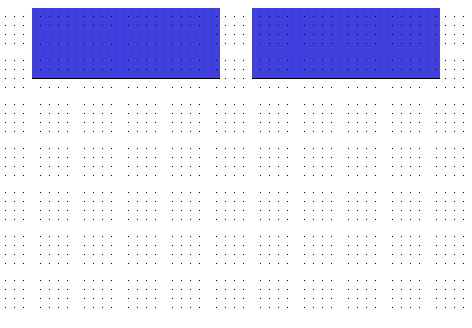
- Embed two versions of the symbol on the Mimic. Size and position them so that the Mimic looks like this:

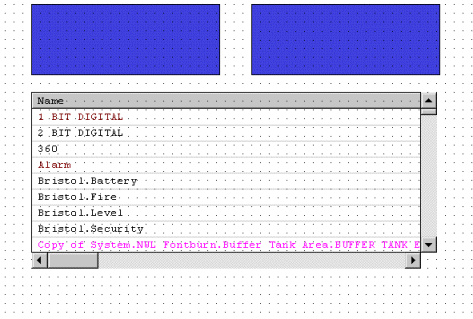
- Embed the Points List below the two symbols like this:

- Display the Animations window for the embedded List and define this animation:
- Sql—Enter the following expression:
'SELECT "FullName", "Id", "Foreground", "Blink", "Background", "CurrentValueFormatted", "CurrentStateDesc", "SourceName"FROM CDBPOINT WHERE "SourceName"=''' + REGISTRY( 'OS Filter', ' ' ) + ''''
This defines the columns that are included in the List, the location of the data that is to be shown in the List (the CDBPoint table), and it also defines the filter as being the SourceName equals the Registry value. The name of the registry key will be stored as 'OS Filter'.
- Sql—Enter the following expression:
- Close the Animations window.
- Display the Animations window for the embedded symbol on the left-hand side.
- Define these animations:
- BoxText—Enter the following string as the expression:
'Outstation 1'
- Registry—Enter the following string as the value that is written to the registry:
'OS reg.Modbus Outstation 1'
- RegistryKey—Enter the name of the registry key (this has to match the registry setting in the SQL of the embedded List):
'OS Filter'
- BoxText—Enter the following string as the expression:
- Close the Animations window.
- Display the Animations window for the embedded Symbol on the right-hand side.
- Define these animations:
- BoxText—Enter the following string as the expression:
'Outstation 2'
- Registry—Enter the following string as the value that is written to the registry:
'OS reg.Modbus Outstation 2'
- RegistryKey—Enter the name of the registry key (this has to match the registry setting in the SQL of the embedded List):
'OS Filter'
- BoxText—Enter the following string as the expression:
- Close the Animations window.
- Save the Mimic.
- Display the Mimic in Run Mode.
- Select the 'Outstation 2' button. (The 'Outstation 2' text is provided by the animation of the symbol's BoxText property that you created as a parameter).
The embedded List is filtered so that it only shows the points on 'Outstation 2'. When you select the button, a value is written to the registry key and this value causes the specified filter to be applied to the List. - Select the 'Outstation 1' button.
The embedded List is filtered so that it only shows the points on 'Outstation 1'.