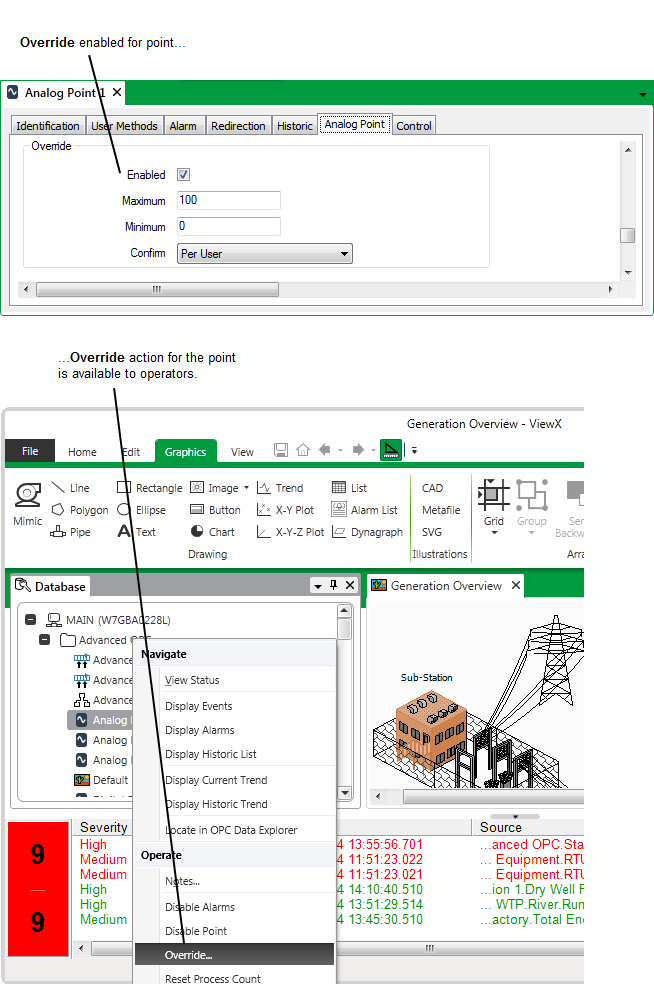
You can use the Analog Point Form to define whether a point’s value can be overridden. You can also define the range of valid override values.
The Override action allows users whose User Accounts are allocated the Override/Release security permission to define the value of that point. The override feature is useful when a known detected fault is resulting in an incorrect value being reported for a point—an operator can temporarily override the value back to a suitable value until the detected fault has been corrected. Overrides can also be used to simulate different plant states when testing the system.

However, you may require that a point value cannot be overridden. When the Override feature is disabled, ClearSCADA continues to use the point’s actual value—the value reported by the outstation, PLC, or other device on which the point is located—regardless of the state of that device.
To configure the override feature for an analog point:
- Display the Form for the analog point that you want to configure (see Display a Form in the ClearSCADA Guide to Core Configuration).
- Select the Analog Point tab.
(If you are configuring this feature for another point that uses analog-type processing, select the appropriately named <Point Type> tab.) - Use the Enabled check box in the Override section to define whether the point can be overridden:

Either:
- Select the Enabled check box in the Override section.
The Maximum and Minimum fields become available. You need to use the Maximum and Minimum fields to define the override range (proceed to step 4).or:
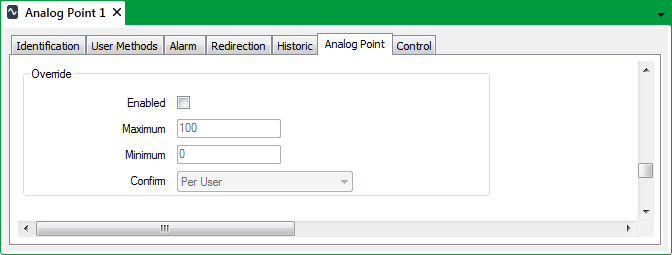
- Clear the Enabled check box.
The Maximum and Minimum fields are grayed out. The point cannot be overridden (ignore step 4).
- Select the Enabled check box in the Override section.
- Use the Maximum and Minimum fields to define the override range. The range defines the values that operators can enter to override the point—any value between and including the minimum amount and the maximum amount.
- In the Maximum field, enter the highest value that operators can use to override the point.
- In the Minimum field, enter the lowest value that operators can use to override the point.
- Use the Confirm combo box to define whether a confirmation dialog box is displayed whenever an operator requests that a point is overridden (see Requesting Confirmation of Action Requests in the ClearSCADA Guide to Core Configuration).
- Save the configuration (see Saving Configuration Changes in the ClearSCADA Guide to Core Configuration).
If you enable the Override feature, ensure that the point’s Override/Release security permission is suitably set (see Allocating Security Permissions in the ClearSCADA Guide to Security).