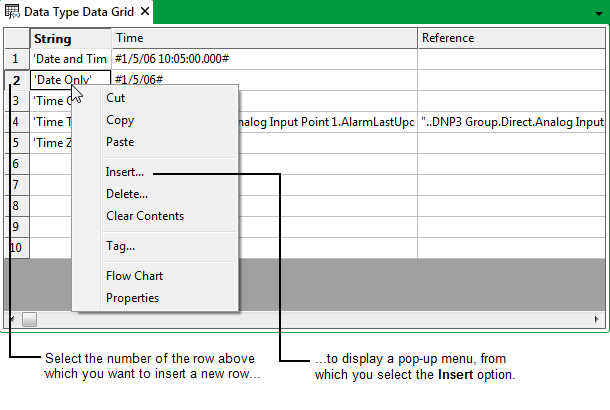
You can add single or multiple rows to a Data Grid. The procedures below list the steps that you follow in order to insert a single row. To insert more than one row, either drag over a block of rows, or see Keyboard Shortcuts for other ways of making multiple selections. The number and location of the rows that you select determines the number and location of the rows that are inserted immediately above your selection. (To add a row to a Data Grid that contains no rows, see Add Rows to an Empty Data Grid.)
Example:
If you select a block of four rows and choose to insert additional rows in that Data Grid, a block of four new rows will be inserted immediately above the selected block of rows.
However, if you select four rows in different parts of the Data Grid and choose to insert additional rows into that Grid, one additional row will be inserted immediately above each selected row.
To insert an additional row in a Data Grid, either:
- Right-click on the number of the row above which you want to insert an additional row.
A context sensitive menu is displayed. - Select the Insert option.
A new row is inserted above the specified row.
Or:
- Right-click on the cell or row number above which you want to insert an additional row.
A context sensitive menu is displayed.Do not select a field heading—the Insert option for a field heading inserts a new field (column) not a new row.
- Select the Insert option.
The Insert window is displayed..png)
- Select the Entire row option button.
- Select the OK button.
The Insert window is closed and a new row is inserted above the specified row. Any affected rows are renumbered accordingly.