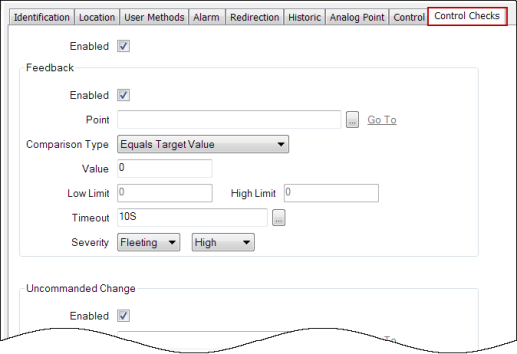
Below you will find a worked example of how to configure a check on the feedback input from a device to confirm that a control sent to the device has been successful (the example does not provide detailed configuration information, so if you need more detail see Control Feedback Settings).
In the example, we will configure a check that verifies whether the feedback input value is between specific high and low limits. If the input value falls outside of these limits, we will specify that ClearSCADA should trigger a fleeting alarm.
We will assume that an analog output point for the device already exists in the database (in this case a DNP3 analog output point) and has been configured - apart from the feedback settings. We will also create and configure a DNP3 analog input point to act as the feedback point (but we could have used a suitable existing point or the DNP3 analog output point itself).
The procedure is as follows:
- First, we will create and configure a DNP3 analog input point to act as the feedback point and name it 'Feedback Point'.

- The next step is to set up the feedback check by configuring the Control Checks tab fields on the DNP3 analog output point.

- We start by selecting the Enabled tick box to enable the fields in the Feedback section of the Control Checks tab.

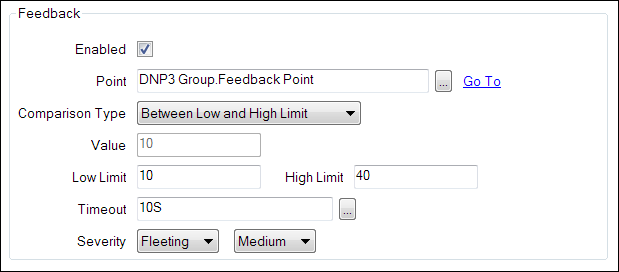
- Next, we will specify the feedback point that we want to associate with the output point. To do this, we select the browse button to the right of the Point field to display a Reference browse window, then select the point from the displayed list. In this case, the point is named 'Feedback Point'.

- We now need to set up the control check itself. In this case, we are going to check that the feedback input value is between 10 and 40 within a timeout period of 10 seconds (the timeout is the amount of time after a control has been sent to the device that ClearSCADA will wait for feedback from the device). So, we set the Comparison Type to Between Low and High Limit, the Low Limit to 10, the High Limit to 40 and the Timeout to 10S.

- If the feedback value is still outside the specified limits once the timeout expires, we want to raise a fleeting alarm. Therefore, we will set the leftmost Severity field to Fleeting and the rightmost Severity field to Medium (the level of importance we want to associate with the alarm compared to other alarms).
- And that's it. We just need to save the form and we have finished.