When you an Alarm Summary, Events List, Configuration Change or Historic data, the each initially show entries for the interval that is defined by your User Account’ for example Event List Range,(see Define the Time Range for a Users Events List in the ClearSCADA Guide to Security).
To display the entries for a particular time period:
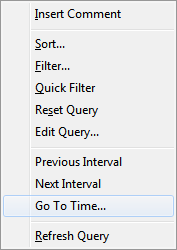
- Right-click on an entry within a List.
A context-sensitive menu is displayed.
- Select the Go To Time option.
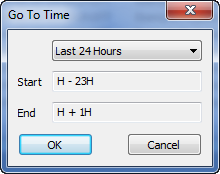
The Go To Time window is displayed.
- Use the combo box at the top of the window to select either:
- A predefined time period (such as ‘Previous Hour’).
- The Relative Time option, if you want to specify a time relative to the present time. Go to step 5.
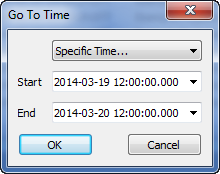
- The Specific Time option, if you want to specify a specific date and time for which to display entries. Go to step 6.
- If you have specified a predefined time period in step 3, the Start and End fields will be populated automatically with the relevant time values and will be ‘grayed out’. Go to step 7.
- If you specified the Relative Time option in step 3, use the Start and End fields specify the required time interval for which the List is to display entries. The interval has to be relative to the present time, and you have to specify the time in the OPC Relative Time Format. You can specify a single time unit, or a time unit followed by an offset in either field. You can specify the time value in either short or long OPC Relative Time Format. Once you have specified the required time interval, go to step 7.
Example:
Start: H - 3H
End: 2H
(To display two-hours’ worth of entries, for an interval starting three hours ago.) - If you specified the Specific Time option in step 3, use the Start and End fields to specify the specific time period for which the List is to display Entries.

Either overtype the existing entries with the required dates and times, or use the Calendar window to specify each date and then overtype the time elements (see Specifying the Required Entry in a Date and Time Field in the ClearSCADA Guide to Core Configuration).
The entry in each field is displayed using the syntax that is defined by the user’s Date Format. For example,
yyyy-MM-dd HH:mm:ss.SSS. - Select the OK button to confirm the settings.
The Go To Time window is closed and the List is filtered to show only those entries that occurred during the specified time period.