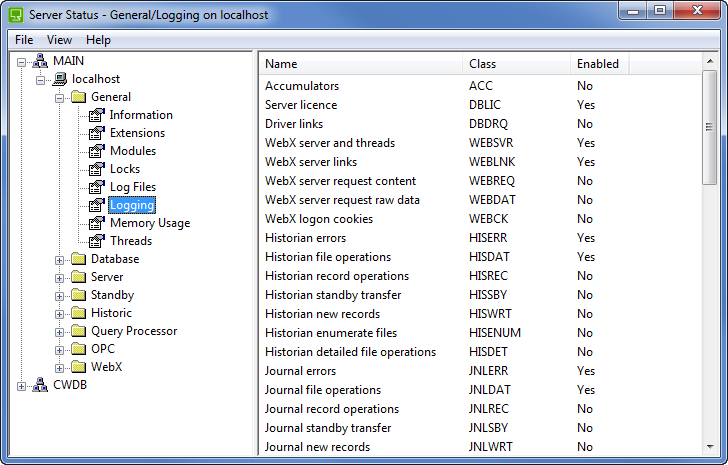
You can use the ClearSCADA Server Status Tool to control what data is included in the server log files. By enabling or disabling the various logging classes, you can control what information is included in the server log files. To do this, you need to access the General/Logging display on the ClearSCADA Server Status Tool.
To enable or disable the various logging classes:
- Run the Server Status Tool (see Run the Server Status Tool in the ClearSCADA Guide to the Server Status Tool).
- Expand the General folder and select Logging.

The Logging section lists the logging classes.
- Right-click on a class to display a context sensitive menu.
- Select:
- Enable—To enable logging for a class. The enabled logging classes will have an effect on the load, which can become excessive depending on the operations being performed.
- Disable—To disable logging for a class.
- Enable All—To enable logging for all classes.
- Default—To enable the default logging settings for the classes. We recommend that you use this option unless instructed to enable/disable logging for specific classes by Schneider Electric engineers.
- Minimal—To enable the minimal suggested logging settings. Schneider Electric engineers may request you to select this option if there is an excessive load on your system.
- Disable All—To disable logging for all classes.
We recommend that you select the Default setting. You can then use the log files to investigate unexpected occurrences, or you can pass the information in the log files on to Schneider Electric staff for analysis.