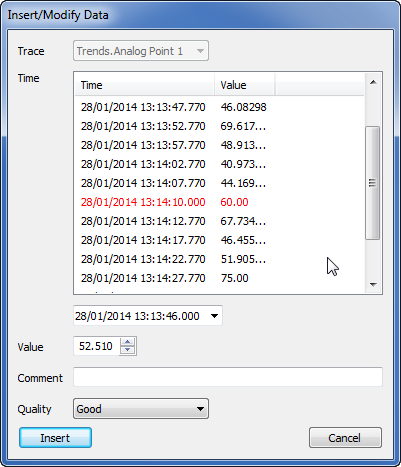
This topic describes how to modify a single value on a Historic Trend. For information about modifying a 'block' of values on a Historic Trend, see Modify a Range of Values.
You can change the value of a marker on a historic Trend. This is useful when a value that has been recorded historically for a point is not representative of normal conditions. For example, you may want to modify a historic value if a recorded value is inaccurate due to an equipment malfunction.
To modify a value on a historic Trend:
- Right-click in the main display area on the Trend.
A context sensitive menu is displayed. -
Select the Insert/Modify Data option.
The Insert/Modify Data window is displayed.
- Use the Trace combo box to select the trace to which you want to modify the value.
- Select the value that you want to modify in the Time area.
- Use the Time combo box to define the date and time. You can choose the date from the context sensitive calendar window and overwrite the existing time value or you can overwrite both values.
- Use the Value spin box to set the value (or overwrite the value).
- Select the Modify button.
The Insert/Modify window is closed, and the value is modified in the point’s historic data. This causes the trace to display the modified value.
You can view information for the modified value by positioning the cursor over the marker for the modified value (the marker is blue if your system uses the default color settings). Information about the value is shown in the ToolTip, including the value, time stamp, and the name of the user that modified the value.