To display an Explorer Bar in ViewX:
- Select the View tab on the ViewX ribbon.
- Select the relevant command from the Database Views command group to display the required Explorer Bar. (For example, select the Database command, in order to display the Database Bar.)

The specified Explorer Bar is displayed.
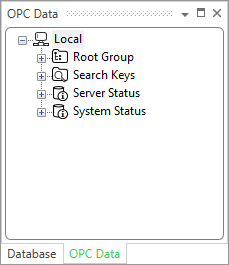
You can display multiple Explorer Bars in ViewX by selecting another command from the Database Views command group. (For example, select the OPC Data command.) Only the commands for the Explorer Bars to which your user account has access are enabled.

When the Explorer Bar opens, you can access the Explorer Bar that you require from the tabs at the bottom of the Explorer Bar Pane.
To reposition the Explorer Bar on screen you can drag the required Explorer Bar by its tab and float the Explorer Bar into position.
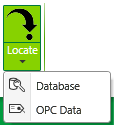
To access the Database Bar or OPC Data Bar, you can also use the Locate command on the View tab. The Locate command is available when an item's display is open in the document display area. The command enables you to locate the item in the selected Explorer Bar. To do this:
- Select the View tab on the ViewX ribbon.
- In the Tools command group, either:
- Select the Locate command.
The Database Bar is displayed. The Explorer Bar is expanded to show the location of the item for which a document or other ViewX display is on show in the document display area.
Or:
- Select the arrow button on the Locate command.

- Select the required Explorer Bar option. Only the options for the Explorer Bars to which your user account has access are enabled.
The specified Explorer Bar is displayed. The Explorer Bar is expanded to show the location of the item for which a document or other ViewX display is on show in the document display area.
- Select the Locate command.
Further Information
Hide and Display an Explorer Bar in ViewX: see Using Auto Hide for a Tool Window.