The Font tab is available for Mimic objects that have text settings, including text boxes and embedded Trends (there are several Font tabs on some embedded displays, such as embedded Trends).
You can use the Font tab settings to define the appearance of text.
Each Font tab contains these settings:
- Family—Use the Family combo box to choose the style of font. There are many font styles available. To preview your choice of font, use the Family combo box to select the required font, then move the Properties window so that you can see the text on the Mimic. The text will be shown in the font you have chosen.
- Height—Use the Height spin-box to set the size of the text. Simply increase the number to make the text bigger or decrease the number to reduce the text size. The text size is measured in points.
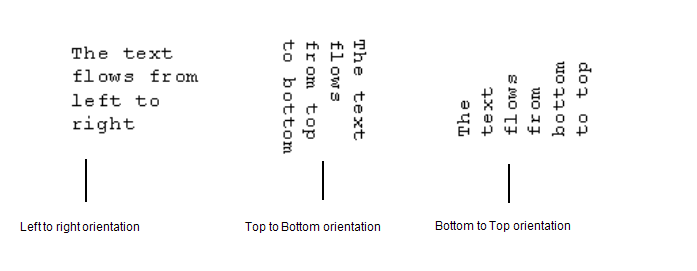
- Orientation—This field is only available for text boxes and it allows you to change the direction of the text. You can set the text to be:
- Left to Right—The text will start at the left-hand side of the text box and will flow to the right-hand side.
- Top to Bottom—The text will start at the top of the text box and will flow downwards to the bottom.
- Bottom to Top—The text will start at the bottom of the text box and will flow upwards to the top.

- Format—Allows you to define the format for the text. This is especially useful for controlling the display of dates, times, values, and so on.
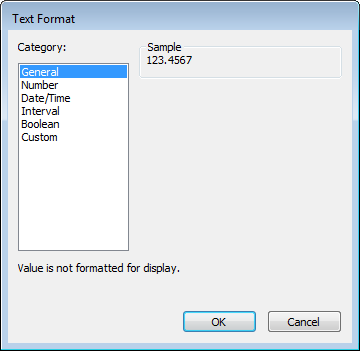
When you select the Format button, the Text Format window is displayed.

You can use the Text Format window to define the format for the following categories of text:
- Number—Allows you to define the number of decimal places, trailing zeros, and so on.
- Date/Time—Allows you to define the format of date and time entries.
- Interval—Use to define the format of time periods.
- Boolean—Use to define the format of Boolean (0 or 1/True or False) values.
- Custom—Use to define a custom format, that is, a format that is different to any of the default categories.
To alter the settings for a category, select a category in the left-hand field, then use the settings that are shown on the right-hand side of the window to define the required format. For detailed information on defining Text Formats, seesee Defining the Format of Displayed Values in the Geo SCADA Expert Core Configuration Guide.
- Style—Use to define whether any special characteristics are applied to the text. Typically, the characteristics are used to create emphasis.
You can choose from:
- Bold—Select the check box to embolden the text (make it darker and slightly larger) or clear it to use normal text.
- Italic—Select the check box to italicize the text (make the text thinner and lean to one side) or clear it to use normal text.
- Underline—Select the check box to apply a line under the text or clear it to use normal text.
- Strikeout—Select the check box to apply a line through the middle of the text or clear it to use normal text.
- Alignment—Use the option buttons to define the location of the text within the text box (this section only applies to text boxes). You can choose from:
- Left Center Right—The option buttons on this row apply to the vertical position of the text. If you select Left, the text is positioned on the left of the text box. Selecting Center places the text in the middle, and selecting Right places the text on the right-hand side of the text box.
- Top Center Bottom—The option buttons on this row apply to the horizontal position of the text. If you select Top, the text is positioned near the top edge of the text box. Selecting Center places the text in the middle, and selecting Bottom places the text near the bottom edge of the text box.
You can select one option from each row.