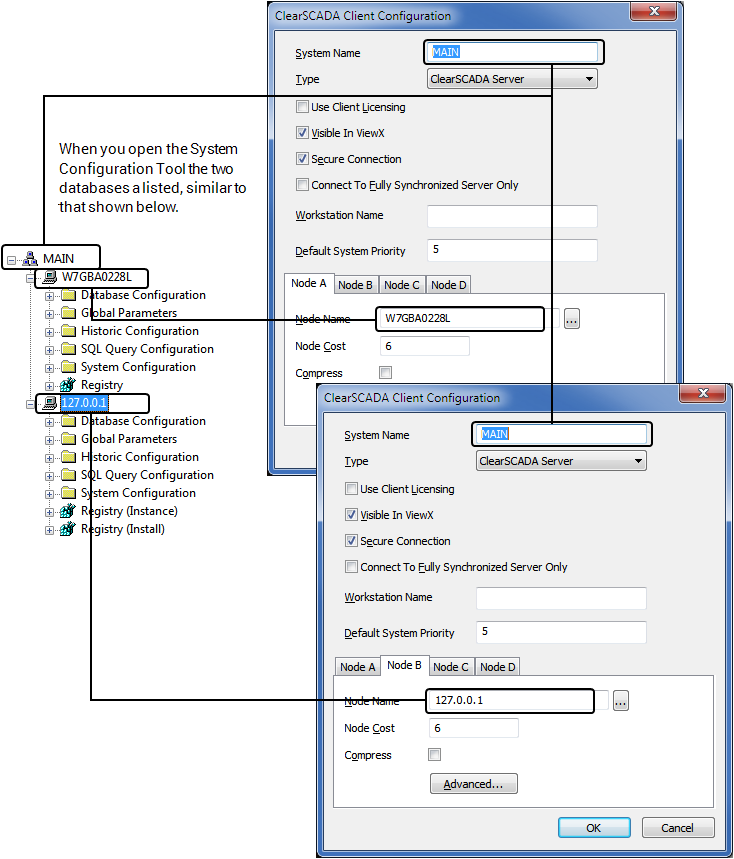
You can configure a Hot-Standby system on a single system. This configuration does not provide you with any backup or system redundancy, but provides you with a way to test a Hot-Standby system. The general procedure for this configuration is very similar to a standard Hot-Standby pair on two systems. This topic assumes you have some prior experience of installing Geo SCADA Expert, links are provided to each section describing each step in more detail.
Install Geo SCADA Expert and Add a second Database Instance
This procedure assumes you a server system without a previous installation of Geo SCADA Expert.
- Install Geo SCADA Expert on the selected system, see Installing Geo SCADA Expert.
- Configure or import your database, see Organizing and Configuring your Database.
Ensure you configure an administrative user in addition to the Super User, see Configure User Accounts Appropriately.
- Open the Database Manager Tool, see Display the Database Manager.
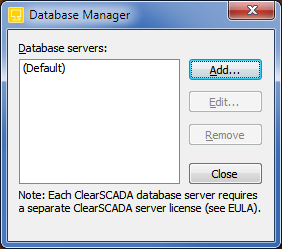
- Use the tool to add another Database Server, see Add a Database Instance.
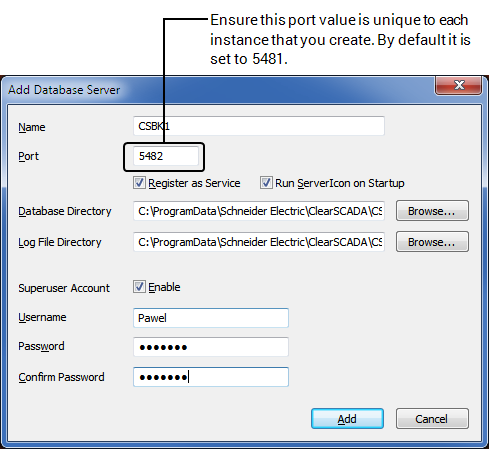
- It is very important that you change the default port value from 5481 to a unique value for this database. You should ensure you also configure a Superuser Account for the new instance to allow you to login to it initially.
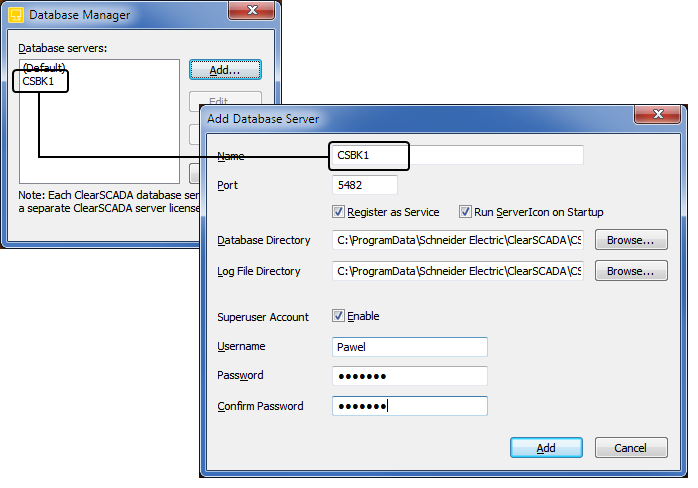
At this stage you should have two database icons and if you start them both they should appear blue.

Configure Client Connections
Once you have created the additional instance you need to establish a connection to the client.
- Before you can access the second database using the ViewX client you need to configure a client connection, see Display the Geo SCADA Expert Client Applet.

- Select the System that you have currently installed to view the properties.
- The first database that you installed and configured appears as Node A, with a Node Name ‘localhost’ (see Display the Client Configuration Window).
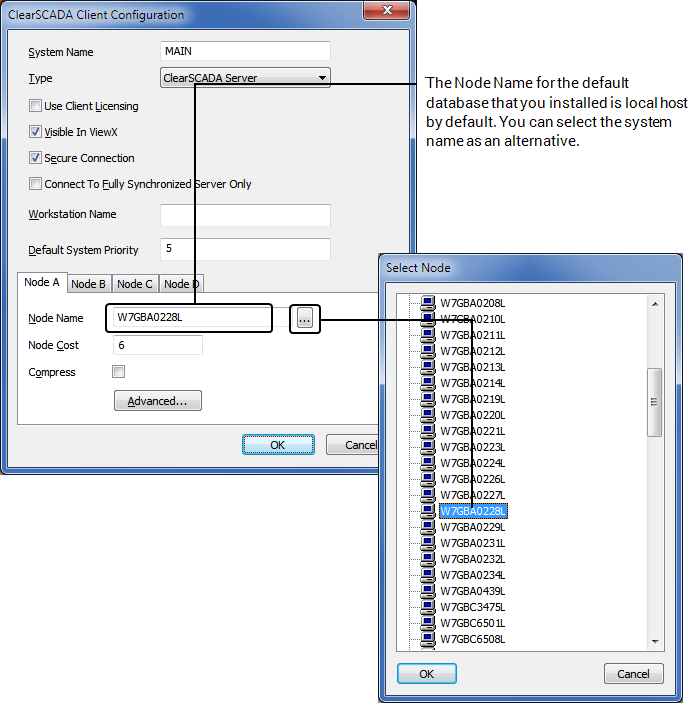
You can leave the Node Name as ‘localhost’, which will appear in ViewX, alternatively you can select the name of the system to more easily identify the node.
- Add the second database instance as another node to this client, select Node B.
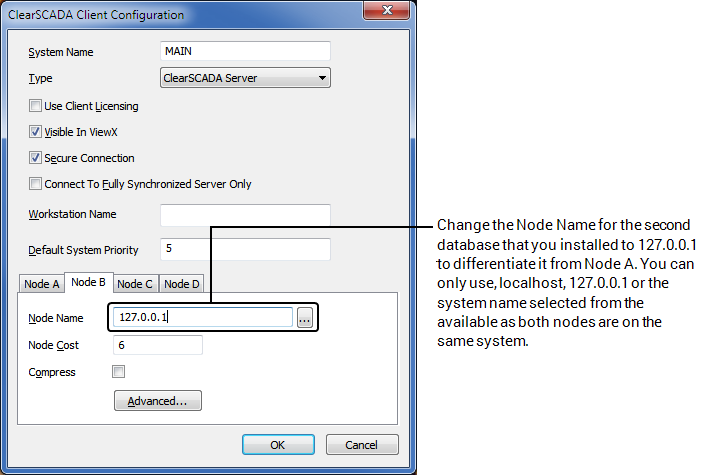
As the second database is also on the same system then the node name is also localhost, by default. You should change this to 127.0.0.1, which is the localhost IP address, to differentiate it from Node A, when you view the databases in System Configuration.
Configuring the Hot-Standby Configuration Partner Settings
Use the Server Configuration Tool (see Accessing the Geo SCADA Expert Server Configuration Tool) to configure the two servers to act as a hot standby pair (see Hot-Standby Pair Architecture) .

You need to access the Partners section within the System Configuration branch for each server, see Configure the Partners Settings of a Server.
Since both servers are on the same physical system you can access the Server Configuration Tool using either Server Icon. Within the Server Configuration Tool you can select the server you want to configure. You need an administrator user account (or Superuser) to login to each database to access the settings.
You need to configure each server as part of a Hot-Standby Pair, see Configure a Hot-Standby Pair. As both servers are on the same system you should use the IP address of 127.0.0.1 for both servers, but the ports will differ.
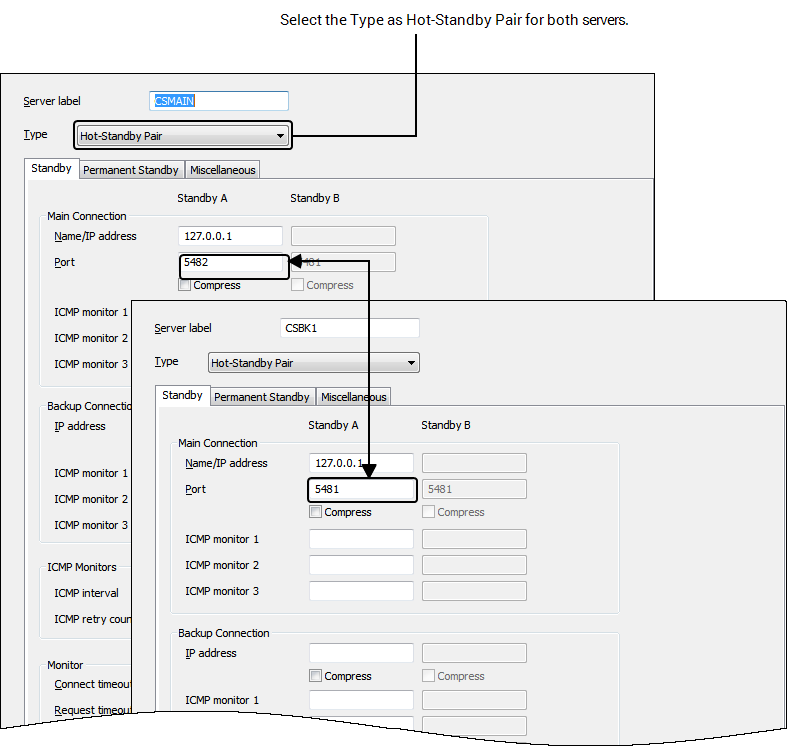
Once you have completed the configuration settings you need to restart the servers, see Service Manager. The order in which you start the servers determines which one becomes Main and which the Standby. You should still have two server icons, one dark blue and one cyan.
![]()
