You can Generate a DNP3 SCADAPack Profile’s Data Programmatically or manually.
When you first add a DNP3 SCADAPack Profile to your database, that Profile will have no rows. Use the procedures below to add single or multiple rows of vectors to your Profiles. Each Profile needs to include one row per change in profile value. The maximum rate at which a profile can change value is at one-minute intervals.
In order to perform any of the procedures below, you first need to display the required DNP3 SCADAPack Profile in Design mode (see Displaying an Editor in the Geo SCADA Expert Guide to Core Configuration).
To add a row to a Profile that does not contain any rows.
- Display the Database Bar (see Display an Explorer Bar).
- Right-click on the Profile that you want to edit.
A context sensitive menu is displayed. - Select the Edit <Name> Profile option, where <Name> refers to the assigned profile name.
The profile editor is displayed in the Document Window.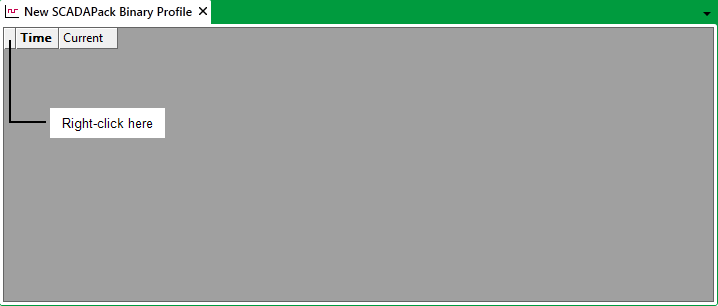
- Either:
- Right-click on the top left of the DNP3 SCADAPack Profile editor.
A context sensitive menu is displayed.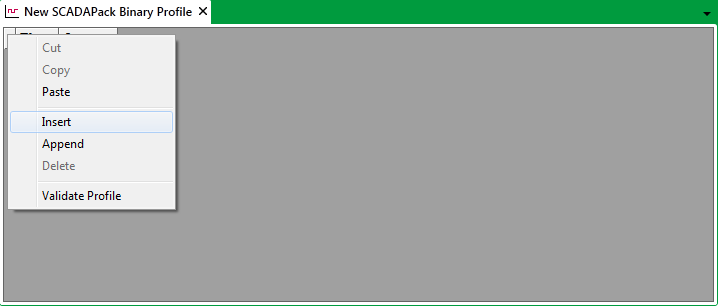
- Select the Insert option.
A row is added to the DNP3 SCADAPack Profile.Or:
- Press the CTRL and SHIFT and + (PLUS SIGN) keys simultaneously (where the latter key is the PLUS SIGN on the main keyboard, rather than the numeric keypad).
A row is added to the DNP3 SCADAPack Profile
- Right-click on the top left of the DNP3 SCADAPack Profile editor.
To add a row above any existing row within and existing Profile.
- Either:
- Right-click the row above which the new row is to be added. (To select a row, select the index number of the row (the number that is displayed on the left-hand side of the Editor), to highlight the whole row.)
A context sensitive menu is displayed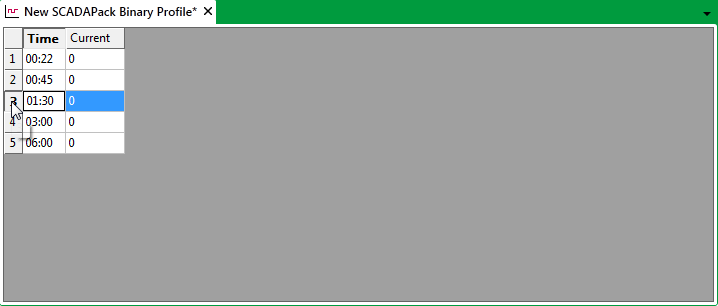
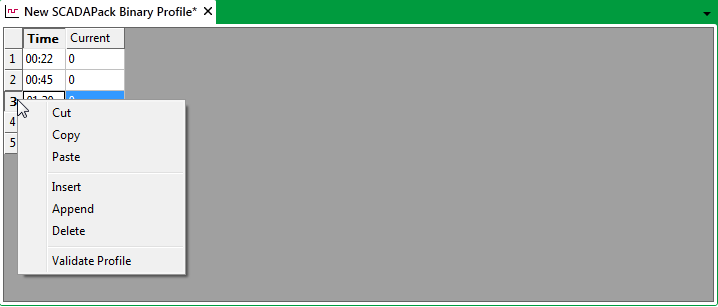
Select the Insert option
A new row is added above the highlighted row.Or:
- Press the CTRL and SHIFT and + (PLUS SIGN) keys simultaneously (where the latter key is the PLUS SIGN on the main keyboard, rather than the numeric keypad).
A new row is added above the highlighted row
- Right-click the row above which the new row is to be added. (To select a row, select the index number of the row (the number that is displayed on the left-hand side of the Editor), to highlight the whole row.)
To add a new row after the last existing row, either:
- Right-click the row below which the new row is to be added. (To select a row, select the index number of the row (the number that is displayed on the left-hand side of the Editor), to highlight the whole row.)
A context sensitive menu is displayed. - Select the Append option.
A row is added to the end of the profile.
Or:
- Press the CTRL and SHIFT and ALT and + (PLUS SIGN) keys simultaneously (where the latter key is the PLUS SIGN on the main keyboard, rather than the numeric keypad).
A row is added to the end of the profile.The Append option is ‘grayed out’ and unavailable for use if the last existing row has a time of 23:59 or equivalent (that is, one minute before midnight), as this is the latest time that a DNP3 SCADAPack Profile can support.
To add multiple rows to a Profile, perform one of these procedures:
To double the number of existing rows (if possible):
- Right-click on the top left of the DNP3 SCADAPack Profile editor.
A context sensitive menu is displayed. - Select the Insert option.
The number of existing rows doubles (if possible). The new rows are inserted before any of the existing rows.If the time allocated to the first existing row is such that the number of rows cannot be doubled, as many new rows as possible will be inserted before the first row, each being assigned a different time, in sequential order.
To insert a specific number of rows above a block of existing rows:
- Drag over a block of existing rows at the required insertion point, until the relevant number of rows are highlighted. (For example, highlight four rows, in order to insert four new rows immediately above the block of highlighted rows.)
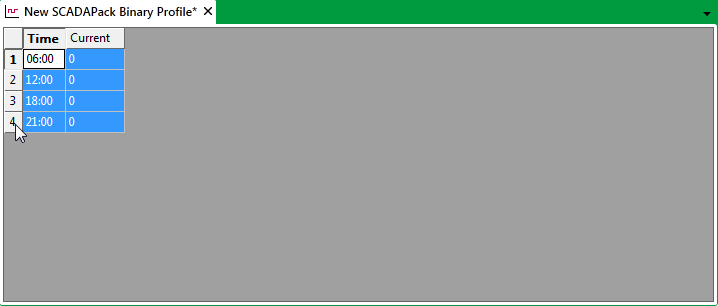
- Either:
- Right-click on the selected block of rows.
A context sensitive menu is displayed. - Select the Insert option.
A block of rows is added above the highlighted rows.
Or:
- Press the CTRL and SHIFT and + (PLUS SIGN) keys simultaneously (where the latter key is the PLUS SIGN on the main keyboard, rather than the numeric keypad).
A block of rows is added above the highlighted rows.NOTE:If sufficient room exists, the required number of rows are added. (For instance, if four rows were highlighted, four new rows will be inserted immediately above the block of highlighted rows.)
If the time allocated to the uppermost highlighted row is such that only a smaller number of rows can be inserted above it, as many rows as possible will be inserted above that row. Each new row will automatically be allocated a different time, in sequential order.
NOTE:If no new rows can be inserted above the uppermost highlighted row, the computer will beep.
- Right-click on the selected block of rows.
To select and insert multiple non-consecutive rows, follow the procedure shown above, but at step 1 hold down the CTRL key while you select each row above which you want to insert another row.
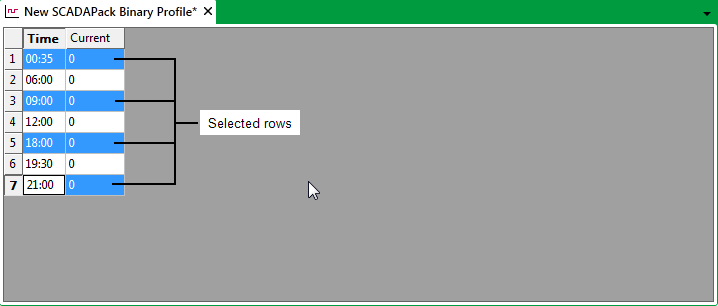
You can also use the standard Windows® keyboard shortcuts, context sensitive menu options, or the Clipboard commands on the ViewX ribbon's Edit tab to copy and paste column(s), row(s) of vectors, or parts of rows (see Use Copy and Paste to Copy a DNP3 SCADAPack Profile’s Data).
Further Information
Manually Edit the Vectors on a DNP3 SCADAPack Profile.
The ViewX ribbon's Edit Tab.