You can optionally filter alarms by Areas of Interest. This filter only applies if the Area of Interest feature is enabled on your system (see Restrict Alarm and Event Access to Specific Areas of Interest in the ClearSCADA Guide to Core Configuration).
To filter alarms by Area of Interest:
- Display the Filter Window (see Use the Filter Window to Filter Alarm Entries).
- On a ViewX Client that can access multiple ClearSCADA databases, Specify the Database for which you want to Filter Alarms .
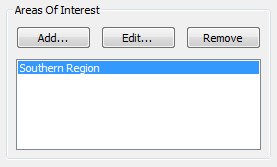
- Select the Add button in the Areas of Interest section.
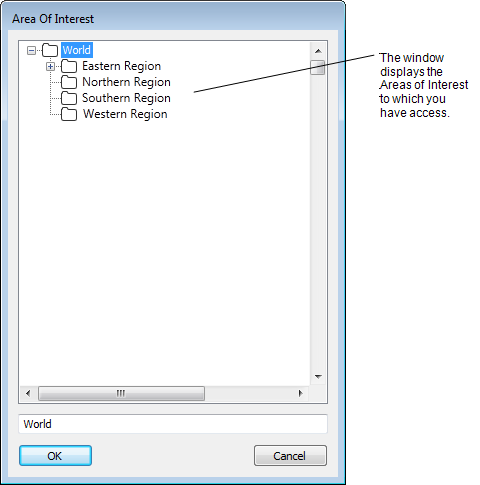
A Reference browse window is displayed.
- Select the required Area of Interest from the window.
- Select the OK button to confirm the choice and close the window.
The specified Area of Interest is added to the Areas of Interest list in the Filter window.
- Repeat steps 2 to 5 for any other Areas of Interest by which you want to filter the Alarms List or Alarm Banner.
- If required, Use the Filter Window to Filter Alarm Entries by other types of filter.
- Select the OK button.
The Filter window is closed and the alarm display is filtered. It only shows the alarms that meet the filter criteria.
To edit an existing Area of Interest filter:
- Select the relevant entry in the Areas of Interest list.
- Select the Edit button.
A Reference browse window is displayed. - Select the required Area of Interest from the window.
- Select the OK button to confirm the choice and close the window.
The edited Area of Interest is updated in the Filter window’s Areas of Interest list.
To remove an existing Area of Interest filter:
- Select the relevant entry in the Areas of Interest list.
- Select the Remove button.
The selected entry is removed from the Areas of Interest list.