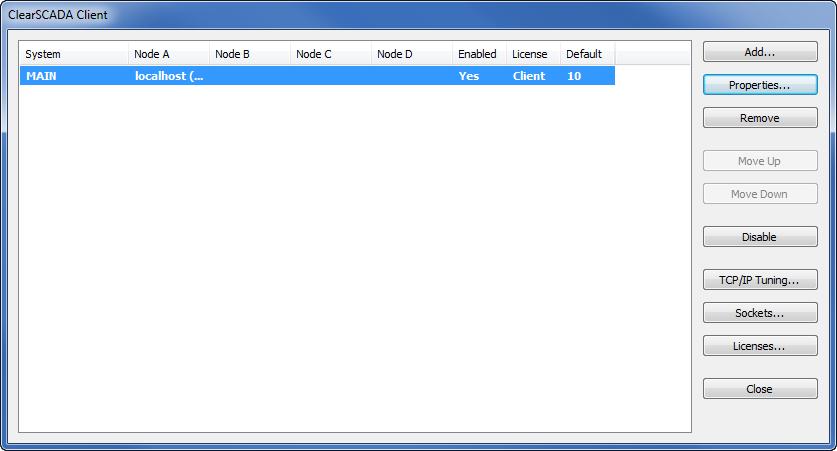
You can use the ClearSCADA Client applet to configure client connections to ClearSCADA. You use the applet to configure the settings at the client end of a connection to the server.
To display the Client applet:
- Select the Start menu button in Windows.
- Select the All Programs option.
- Select the Schneider Electric ClearSCADA option.
- Select the Configure Connections option.
The Client applet runs. It shows a list of the systems (ClearSCADA databases) to which the client can connect (if it cannot currently connect to any systems, the list is empty), and several buttons that you can use to access the client connection configuration settings:
A User Account Control prompt may appear - select Continue on the prompt to allow the ClearSCADA Client applet to run.
The Client applet contains the following buttons:
- Add—Use to add a system (ClearSCADA database) to which the client can connect. You can use the Add button to add:
- ViewX Client - System connections (see Create a New ViewX Client - System Connection)
- ViewX Client - Third Party OPC Server connections (see Create a Connection between a ViewX Client and a Third Party OPC Server)
- Third Party OPC Client - System Connections
- Third Party ODBC Client - System Connections.
A client can connect to multiple systems (it can connect to a maximum of 64 servers).
- Properties—Use to edit a system.
- For ViewX clients, see Edit an Existing ViewX Client - System Connection.
- For Third Party OPC Clients, see Third Party OPC Client - System Connections.
- For Third Party ODBC Clients, see Third Party ODBC Client - System Connections.
- Remove—Use to remove a system. If you remove a system, the clients are no longer able to access it.
- Move Up and Move Down—Use to change the order of systems when multiple systems are available. The order in which the systems are shown in the Client Applet is the same order that is used when the systems are displayed in the Server Status Tool, Server Configuration Tool and also in the various Explorer Bars in ViewX, such as the Database Bar and OPC Data Bar.
The system at the top of the list is shown at the top of the various hierarchical displays, with the other systems following in order from top to bottom. You can change the order by selecting a system in the list, then using the Move Up button to promote the system or the Move Down to demote the system as required.
- Enable or Disable—Use to enable or disable a connection to a system.
- Set as Default—Use to define the default system when multiple systems are available.
- TCP/IP Tuning—Use to define the port settings (see Define the TCP/IP Tuning Settings for a ViewX Client - System Connection).
- Sockets—Use to define the range of sockets that the client uses to receive data from the server (you can define the sockets for each client-server connection). For more information, see Change the Range of Ports for the Client’s Incoming Data.
- Licenses—Use to access the Client License window. The Client License window displays information about the current client license and allows you to associate the client with a different client license file if required (see Associate a ViewX Client - System Connection with a Client License).
- Close—Use to close the Client applet.