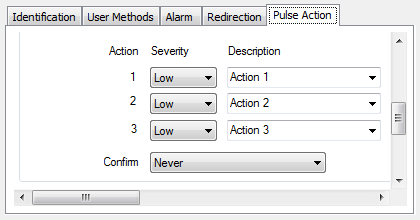
Use the fields within the Actions section of the Pulse Action tab (or the <Pulse Type> tab on some drivers) to define the action(s) that can be undertaken by a pulse action point.

For each available action:
- Use the Severity combo box to define the severity of the event that is logged for a successful control action, and the severity of alarm raised due to an unsuccessful control action. (For more information, see Defining Severities in the ClearSCADA Guide to Core Configuration.)
- In the Description field, either enter a text description for each action, or use the combo box to select one of the pre-defined actions. (To add a pre-defined description to a server on your system, see Define Descriptions for Control Actions in the ClearSCADA Guide to Server Administration.)
- Use the Confirm combo box to define whether a confirmation dialog box is displayed whenever an operator attempts to send a control (see Requesting Confirmation of Action Requests in the ClearSCADA Guide to Core Configuration).
- If the Area of Interest feature is enabled on your system, an additional Area of Interest field is displayed on the Pulse Action tab. Use the field to specify the Area of Interest with which any pulse-related events and alarms are associated.

For more information on configuring Areas of Interest, see Assign a Different Area of Interest to an Item’s Alarms and Events in the ClearSCADA Guide to Core Configuration.
For more information on the Area of Interest feature, see Restrict Alarm and Event Access to Specific Areas of Interest in the ClearSCADA Guide to Core Configuration.
- If available for pulse actions on your drivers, use the fields in the Promote section of the tab to define whether any outstations are scanned in preference to others following a control request (see Promoting Scanning of Outstations Associated with Controls).
- Save the configuration (see Saving Configuration Changes in the ClearSCADA Guide to Core Configuration).