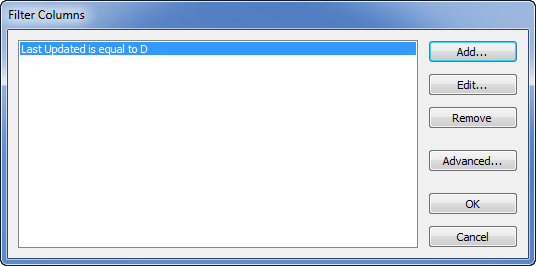
To filter the entries in a List you can either:
- Use the Quick Filter feature to filter a List according to a particular value that is shown in the List (see Quick Filter a List other than an Alarms List)
- Use the Filter Columns window to add a filter to a List. By filtering a List in this way, you can create complex filter criteria to restrict the entries that are included in the List.
To use the Filter Columns window to add a filter to a List such as an Events List, Queries List, or Historic List:
- Display the Filter Columns Window (see Filter a List).

- Select the Add button.
The Add Filter window is displayed.
- Use the first combo box to select the database field to which you want to apply a filter. For a brief description of a particular database field, position the cursor over the highlighted field name to display a ToolTip. The ToolTip provides a description of the field.
Database fields that are commonly filtered on Queries Lists include:
- Alarm State (AlarmState)—Can be filtered so that it only shows, for example, the items that are in alarm, or for which alarms are disabled.
- Name—Can be filtered so that it only shows, for example, items that have a specific name, or that include a particular string within their name.
- Quality (CurrentQualityDesc)—Can be filtered so that it only shows items with a certain quality status, for example, items with Bad Quality.
- Overridden—Can be filtered so that it only shows those points that either are overridden, or are not overridden.
For information on the fields that apply to Events Lists, see Fields by Which you can Filter an Events List.
- Select the filter condition from the second combo box (see Filter Condition Types).
- Select the value you want to set for the filter in the third field. (Depending on your choice in step 4, this field may comprise a combo box, include a browse button, or be a text entry field).
(To specify more than one value in this field, select the >> button next to the second combo box. This is only available for certain combinations of database field type and filter condition. When selected, the Add Filter window expands, enabling you to specify a series of filter values in the third field (see Specify a Series of Filter Values).)
When you filter a List, the value(s) entered in this filter value field are compared against the value of the corresponding field of each record in the ClearSCADA database. If the values match (or the value in the ClearSCADA database is between the minimum and maximum values when a Between filter is used), the corresponding record in the ClearSCADA database is returned and is included in the List. (If the filter condition is an exclusive condition that matches the value of a record in the database, that record is NOT included in the List.)
Values can be:
- Numeric—Useful for searching Historic Lists for particular point values.
- String—Useful for searching for a database item (or group of items).
- Date/Time—Can be an absolute time, or a relative time (see Time Formats for Filters).
- Boolean—Either True or False.
- Reference—Useful for searching for the name or ID of an item in the database.
Depending on the database field that you select in the first combo box, you may need to type in the value yourself. For more information on entering filter criteria, see:
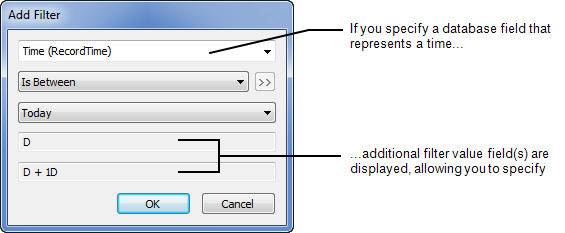
- If you have specified a database field that represents a time, further field(s) will be displayed. If you have specified a Relative Time or Specific Time option in step 6, use these fields to specify the time, or time period, by which the List is to be filtered (see Time Formats for Filters).
(If you specified another option in step 6, these fields will contain predefined base time, or time units, and will be ‘grayed out’.)

ATTENTION: Always include a Time filter with an Alarm Summary, Events Lists and Historic Lists, to restrict the amount of data from which ClearSCADA needs to extract the List’s entries.
- Select the OK button.
The Add Filter window is closed and the new filter criteria is displayed in the Filter Columns window. - Repeat the above steps to add any further filters to the List.
(Multiple filters are combined using the logical AND operator. To combine multiple filters using the logical OR operator, select the Advanced button on the Filter Columns window and directly edit the SQL WHERE clause. For more information, see Use SQL to Create a Filter for a List other than an Alarms List.)
- Select the OK button.
The Filter Columns window is closed. The List is refreshed to show only those records (if any) that meet the filter criteria you have specified.