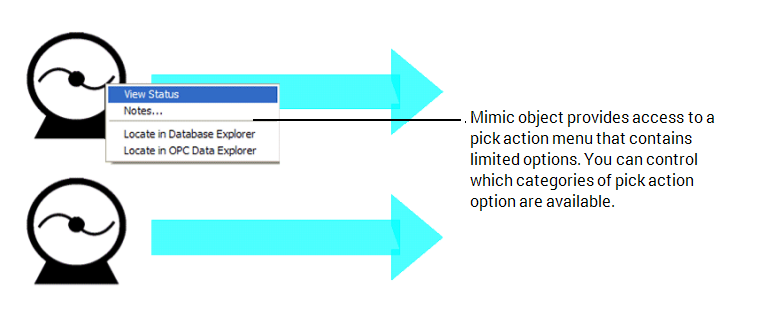
You can animate a Mimic object so that when it is selected in Run mode, a pick action menu that only contains selected actions is displayed. This is useful when you need a Mimic object to provide access to some, but not all, types of action for an object. For example, you may want a Mimic object to provide access to all of a point's pick actions except the Edit Properties action.

To animate an object to provide access to specific actions only:
- Double-click on the Mimic object that you want to animate.
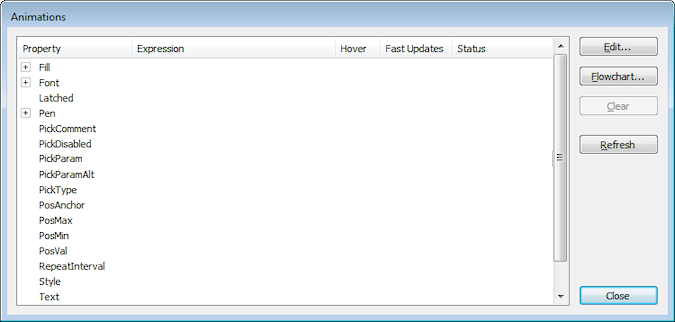
The Polyline Properties window is displayed (the Text Properties window is displayed if you are working with a text box instead of a shape). - On the General tab, select the Animations button to display the Animations window.

- Select the PickParam property (this is the Mimic object property that determines whether the Mimic object provides access to a pick action menu, hyperlink and so on).
- Select the Edit button.
The Expression window is displayed. - Select the browse button to access a browse window. You may also need to select an OPC Tag option from a context-sensitive menu if there are parameters defined on your Mimic.
- Use the browse window to select the Value tag for the item that has the pick action menu that you want to associate with the Mimic object.
- Select the OK button to close the browse window and confirm your selection.
The Expression window shows an expression that defines the path of the selected database item. - Change the expression so that it has this format:
"<path and name of database item>.ObjectLink"+'?<name of pick action>'
Where
<path and name of database item>is the location and name of the database item you selected in the browse window in step 6. Do not enter the angle brackets < >.ObjectLinkindicates that the object menu of the database item is to be associated with the Mimic object.+'?<name of pick action>'is used to indicate that some options on the menu are to be excluded. The<name of pick action>is the code for the name of an action (see the table below) and you do not enter the angle brackets < >.To exclude multiple pick actions from the pick action menu, add the extra pick action names within the single straight quotation marks, inserting an ampersand & before each addition:
+ '?<name of pick action>&<name of pick action>&<name of pick action>'
An expression for a pick action menu associated with a point named 'Analog Input 1' could be:
"...Analog Input 1.ObjectLink"+'?NoView&NoNotes&NoEvents'
This expression would link the Mimic object to the pick action menu for the 'Analog Input 1' point, but would exclude the View Status, Notes, and Display Events actions.
The following table lists the entries required for the pick action options:
Pick Action Entry Required to Exclude the Action from the Pick Action Menu NoView
NoAlarmView
NoHelpView
NoDefaultView
NoNotes
NoEvents
NoAlarms
Display Alarm Summary NoAlarmSummary NoDisplay
Display On Map NoDisplayOnMap Queries (actions for Queries Lists, such as Display Property Changes)
NoQueries
Trends (actions for Trends)
NoTrends
Methods (actions for controls)
NoMethods
User Methods
(any custom methods that have been defined using the User Methods tab on the Form of a database item)NoUserMethods
Alarm Methods (pick actions relating to alarms, such as Acknowledge Alarms)
NoAlarmMethods
Display Errors
NoErrors
NoRefs
Edit Properties
NoProperties
Edit
NoEdit
Links (any link options that have been added via the Server Configuration Tool (see Link Fields in the Geo SCADA Expert Guide to Server Administration).)
NoLinks
NoNavSync
NoLocateOPCNavigator
Locate in Template
NoNavSyncTempl
- Select the OK button to confirm the expression and close the Expression window.
- Select the PickType property on the Animations window. You have to define the type of pick action as well as the parameters for the pick action, otherwise the pick action menu will be unavailable.
- Select the Edit button to display the Expressions window.
- Enter 1 which is the number that corresponds to an Object Menu (that is, pick action menu).
- Select the OK button to confirm the expression and close the Expression window.
- Close the Animations window.
- Save the Mimic.
The Mimic object is now animated so that when you select the object in Run mode, the pick action menu for the relevant pick action menu is displayed. The pick action menu will only contain the options that have not been included in the expression for the PickParam property.