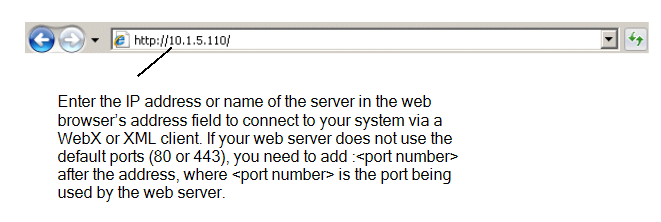
To open a connection between a WebX or XML client and the web server, you need to run a web browser on the client PC and enter the address of the web server in the Address field:

If your web server uses the default port numbers, the address entered in the web browser can use the following formats:
- WebX clients:
http://<server name>
http://<server IP address>
https://<server name>
https://<server IP address>
- Third Party XML clients:
http://<server name>:<XML Port>/webservices/OPC
http://<server IP address>:<XML Port>/webservices/OPC
https://<server name>:<XML Port>/webservices/OPC
https://<server IP address>:<XML Port>/webservices/OPC
Where:
- http: addresses are non-secure connections
- https: addresses are secure connections that make use of the SSL settings (that is,. are encrypted)
- <server name> is the name of the ClearSCADA server that is running the web server, for example, MainSys (do not include the angle brackets <>)
- <IP address> is the Internet Protocol address of the ClearSCADA server PC, for example, 10.1.5.15. (Do not include the angle brackets <>)
- <XML Port> is the number of the port used by the Third Party XML client.
On Third Party XML clients, you have to include the port number in the address field (they also require /webservices/OPC as a suffix).
On WebX clients, you do not need to define the port number unless the web server is configured to use ports other than 80 and 443. If different port numbers are used by the web server, you also have to include the port number in the address, for example:
http://<server name>:<port number>
http://<server IP address>:<port number>
https://<server name>:<port number>
https://<server IP address>:<port number>
Where:
- <port number> is the number of the port that is being used by the web server instead of port 80 or port 443. As before, do not include the angle brackets <>.
NOTE: If a proxy server or proxy firewall is used between the web server and WebX clients, the WebX clients typically communicate via the proxy rather than directly with the web server. With such a proxy setup, you specify the proxy settings in the WebX client's Address field, rather than the actual web server's settings. As such, assume that where 'server' is mentioned in the address syntax shown above, it refers to 'proxy server', rather than 'web server', and where 'port number ' is mentioned , it refers to the 'mapped proxy port number' that corresponds to the web server's port number. For more information, see Define the Proxy Settings for the WebX Server in the ClearSCADA Guide to Security.
When you have entered a valid address, press the Enter key or select the Go button in the web browser to access your system. When the connection is established, the web browser will display a log on page or a homepage (typically a homepage Mimic).
If the connection cannot be established, a connection failure message is displayed Failed WebX Client or XML Client - System Connections.