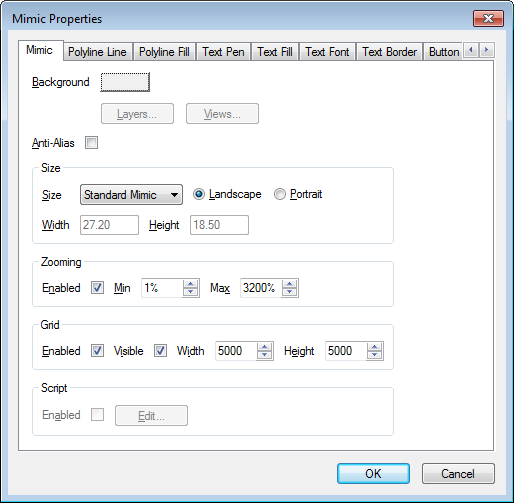
This topic explains how to display the Mimic Properties window that you use to define the default Mimic properties for every new Mimic on your client PC. To define the default Mimic properties for just one specific Mimic, you display a different Mimic Properties window—one that you access via the individual Mimic's Properties option or command, rather than via the procedure shown below. For more information, see Defining the Default Mimic Properties for a Specific Mimic.
You can use the Mimic Properties window to define the default settings for new Mimics (Mimics that have yet to be configured). The settings you define will apply to every new Mimic that you configure on your client PC. New Mimics that are configured on other client PCs may use different default settings, and if you create a new Mimic but it is edited for the first time on another client, the default settings of the other client are applied.
To define the default settings for new Mimics, you need to display the Mimic Properties window via the Options window:
- Display the Options window.
To define settings via the Options window, your user account needs the Configure Options permission. This permission is usually allocated to high level users such as engineers.
- Select the Mimics tab.
- Select the Edit button in the General section.
The Mimic Properties window is displayed.
- Use the Mimic Properties window to define the settings that will apply to every Mimic that is configured for the first time on your client PC. For more information on the settings on the Mimic Properties window, see Mimic Properties Window.