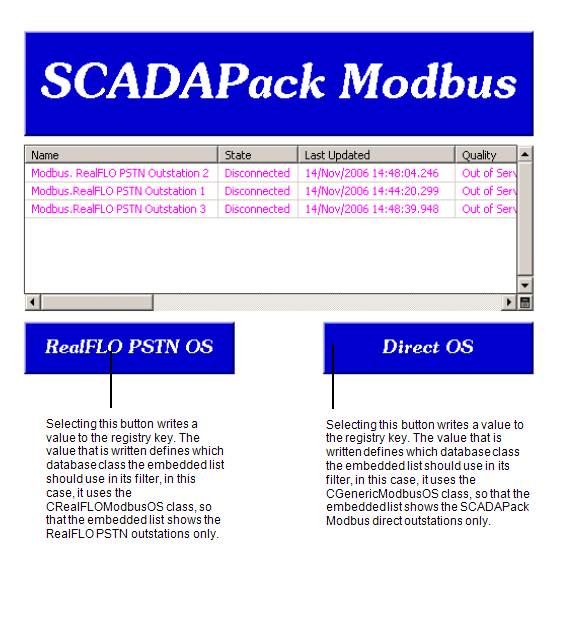
You can use registry settings to apply different filters to an embedded list on a Mimic.
By using a registry pick action, you can create a Mimic that has a selectable button (or another type of object) that toggles between 2 sets of filters. The toggle is only applied to the local machine, so that other users viewing the same Mimic are not shown the filter changes.

To set up a local variable that allows different filters to be applied to an embedded list at the click of a button:
- Embed a List on the Mimic (see Embed a Queries List on a Mimic).
- Animate the Sql property of the embedded list:
- Display the Embedded List Properties window (see Editing an Embedded Query List).
- Select the General tab.
- Select the Animations button to display the Animations window.
- Select the Sql property.
- Select the Edit button to display the Expression window.
- Enter an expression that defines the query that will be applied and define the registry name and value. The format is:
'SELECT Id, <field>, <field> FROM' + REGISTRY('<registry key name>', '<database class>')
Where SELECT defines the start of the query, <field> is the name of a field that is to be included in the query (and returned by the list). Each field has to be separated by a comma. FROM instructs the query to retrieve the defined fields from a specific part of the database. + REGISTRY instructs the system to apply the query to the database class that is named in the registry (the value in the registry will be the name of a database class). <registry key name> is the name you allocate to the registry key that will contain the value that is used to identify the database class and <database class> is the name of the database class that is used if there is no value in the registry key. In each case, do not enter the angle brackets < >.
For example:
'SELECT Id, FullName FROM ' + REGISTRY( 'outstation', 'CGenericModbusOS' )
Where 'SELECT Id, FullName FROM' defines the types of values that are being requested in the query ) Id and FullName. + REGISTRY ('outstation', 'CGenericModbusOS') instructs the embedded list to use the value in the 'outstation' registry key to identify the database class to which the query is applied. If there is no value in the registry key, it will use the default registry key setting of 'CGenericModbusOS'.
- Select the OK button to confirm the expression entry and close the Expression window.
- Close the Animations window.
Now that you have defined the registry setting and filter, you need to create a selectable object that, when selected, will change the registry setting (and therefore will cause the embedded list to use a different filter).
- Add a Mimic object that will act as a display button. When the object is selected, a different filter will be applied to the embedded list. You can use any type of shape, line, or button.
- Edit the object so that it has a suitable appearance. For more information, refer to the Edit section for the relevant type of object, for example, if you are editing a button refer to Editing a Button.
- On the General tab of the object's Properties window, select the Pick Action button. This displays the Pick Action Configuration Wizard.
- On the first 'page' of the Wizard, select the Registry option button. This instructs the system that the object's pick action menu is to write a value to the registry.
- Select the Next button to proceed to the next 'page' of the Pick Action Configuration Wizard.
- In the top field, enter the name of the registry key to which a value is written when the object is selected. The registry key name has to match the name of the registry key that you defined in the expression for the embedded list's Sql animation.
- Set the Key Type combo box to String. The String setting is required as the value that is written to the registry key when the Mimic object is selected contains text (the value defines a class in the database).
- In the Value field, enter the value that is written to the registry when the mimic object is selected. The value needs to be the name of a database class—the name that you enter is the class to which the SQL query for the embedded list will be applied. The name has to be identical to the class name. You can see the available classes by using the ClearSCADA Database Schema (see Welcome to the Guide to the Database in the ClearSCADA Database Guide).
- Select the Next button to proceed to the next step.
- Enter a Pick Action Comment if required, then select the Next button.
- Select the Finish button to end the pick action configuration.
- View the Mimic in Run Mode and select the Mimic object (button, line, shape and so on). You will see that when you select the button, a different filter is applied to the embedded list.
You can use the principles you have used in this procedure to create more selectable objects that apply different filters to the embedded list as required.