NOTE: You need to have configured the required Redirection Actions (see Configure a Redirection Action), Action Rosters (see Configure an Action Roster) and alarm redirection Calendars (see Configure an Alarm Redirection Calendar) before you can select the actions, action rosters, and Calendars for alarm redirection.
Each alarm redirection triggers an action (see Choose a Type of Alarm Redirection), an action roster (see Action Roster), or an alarm redirection calendar (see Alarm Redirection Calendar). The entry that is specified in the Action field on the Redirection tab, determines what happens when an alarm meets the redirection criteria and is redirected.
To define the action to be taken:
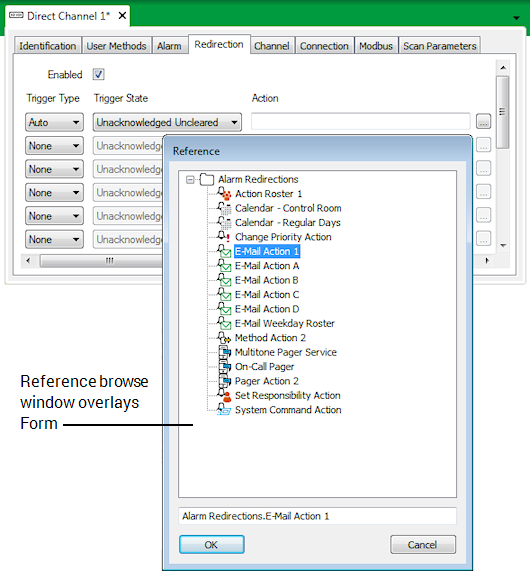
- Select the browse button next to the Action field for the alarm redirection that you want to configure.
A Reference browse window is displayed.
- Use the browse window to locate the Action that is to be performed, or the Action Roster, or alarm redirection Calendar that is come into force when the selected database item has an alarm that meets the redirection criteria.
For example, if you want an E-mail to be sent, select the relevant E-mail Action; if you want a series of actions to trigger on a roster or calendar basis, select the relevant Action Roster, or alarm redirection Calendar.
If the alarm redirection is set to trigger on a Manual basis (see Define the Trigger Type), only a user with Read access to the redirection action, action roster, or alarm redirection calendar that is specified in this Action field will be able to manually redirect an alarm. (Remember that the activity that you specify in the Action field will only come into effect when such a user manually triggers the redirection.)
- Select the OK button.
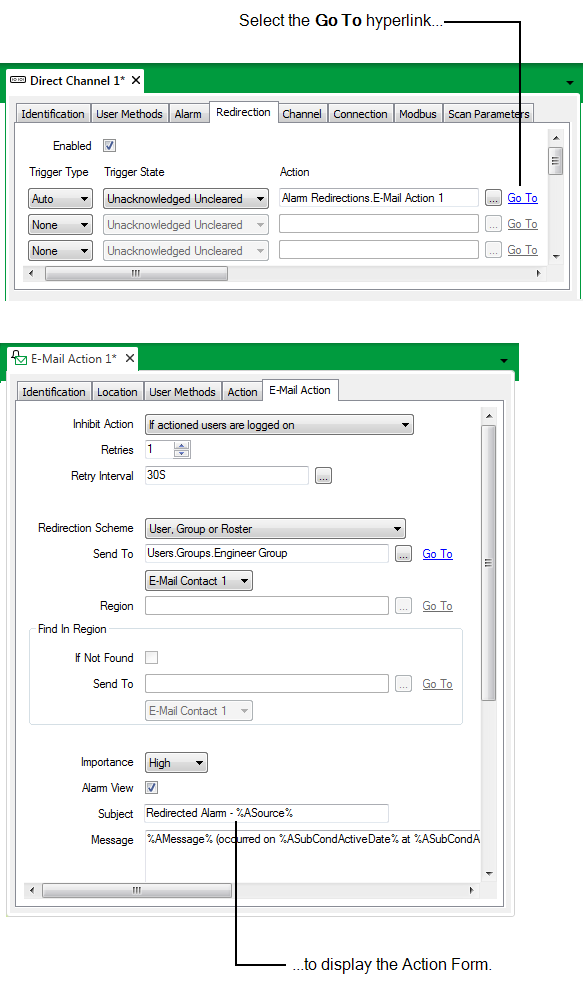
The browse window is closed and the name of the Action, Action Roster or alarm redirection Calendar is shown in the Action field.You can select the Go To hyperlink next to the browse button to display the Form for the Action, Action Roster or alarm redirection Calendar.

As with other items in the database, each redirection Action, Action Roster, and alarm redirection Calendar can be made inactive as well as active. If ClearSCADA does not redirect alarms as expected, ensure that the specified Action, Roster, or Calendar is In Service. You can check this by using the Go To hyperlink to display the item’s Form, selecting the Action tab and ensuring that the In Service check box is selected.
When you have selected an Action, Action Roster or alarm redirection Calendar, you need to Define the Severity Range.