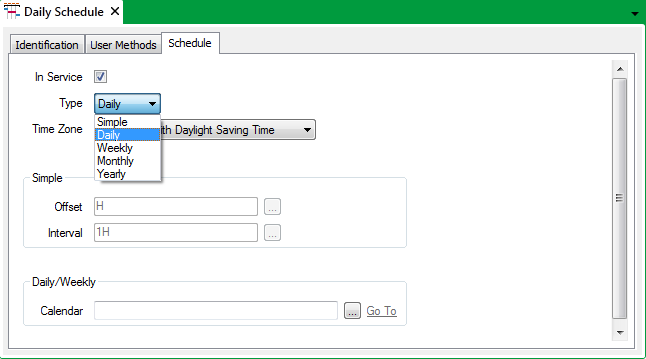
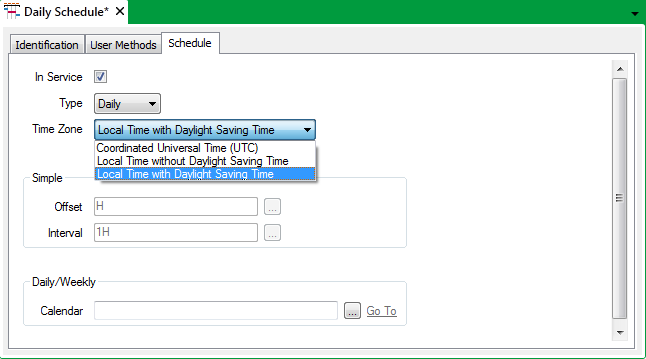
Use the fields at the top of the Schedule tab on the Schedule Form to define the type of Schedule you require, the time zone in which it operates and specify whether the Schedule is in service (‘active’).
To configure these properties:
- Display the Schedule Form.
- Select the Schedule tab.
- Define whether the Schedule is online and can be used by the server to carry out regular functions on the system.
Either:
- Select the In Service check box to put the Schedule online. (For more information, see Placing an Item In Service.)
- Clear the In Service check box if the Schedule is not to be used at this time.
- Use the Type combo box to select the type of Schedule that you require:

- Simple—Select a Simple Schedule for processes that occur with a regularity that is easier to define using an Offset and Interval, rather than by inserting events onto another type of Schedule (see Simple Schedule).
- Daily—Select a Daily Schedule for processes that occur at the same time every day. You can define processes to start from any minute within the 24-hour period on this type of Schedule (see Daily Schedule).
- Weekly—Select a Weekly Schedule for processes that occur at different times each day, or only on certain days of the week. This option produces a display similar to the Daily Schedule, but with the addition of a separate tab for each day. You can define processes to start from any minute of any day on this type of Schedule (see Weekly Schedule).
- Monthly—Select a Monthly Schedule for processes that occur at the same time each month, but for which a Weekly Schedule is not appropriate. You can configure processes to occur at any five-minute interval of any day on this type of Schedule (see Monthly Schedule).
- Yearly—Select a Yearly Schedule for processes that occur infrequently throughout each year. This option produces a display similar to the Monthly Schedule, but with the addition of a separate tab for each month. You can configure processes to occur at any five-minute interval of any day in any month on this type of Schedule (see Yearly Schedule).
- Use the Time Zone combo box to specify the time zone that is used for Schedule execution.

Specify either:
- Coordinated Universal Time (UTC), for the Schedule to execute in UTC.
- Local Time without Daylight Saving Time, for the Schedule to execute in Local Time, for instance EST (Eastern Standard Time) if the local time zone is that for the East coast of America. No adjustments are made for any Daylight Saving Time (DST).
or:
- Local Time with Daylight Saving Time, for the Schedule to execute in Local Time. ClearSCADA automatically adjusts the time to account for Daylight Saving Time (DST).
For more information, see Time Zone Support in ClearSCADA.
- Save the configuration.
If you have specified a Simple Schedule, you can now Define when a Simple Schedule Executes and then add action(s) to your Schedule (see Add an Action to a Schedule).
If you have specified a Daily or Weekly Schedule, you can optionally Associate a Calendar with a Daily or Weekly Schedule.
For a Schedule other than a Simple Schedule, you can now add events and actions to your Schedule (see Add an Event Directly to a Schedule, and see Add an Action to a Schedule).