To produce a Time Profile manually and base that profile on actual historic data:
- Display the Time Profile in Design mode (see Edit a Time Profile).
- If the Time Profile has a Weekly span, select the day of the week for which ClearSCADA is to base the profile on historic data.
(Each Import request imports historic data for a single day. With a Weekly Time Profile, you need to perform a separate Import request for each day of the week for which the profile is to be based on historic data.)
- Right-click on a blank area in the Document Display Area.
A context-sensitive menu is displayed. - Select the Import Historic Data command from the relevant command group.
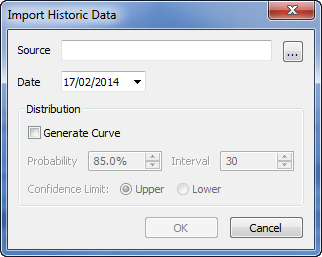
The Import Historic Data window is displayed.
- Select the Source browse button.
A Reference browse window is displayed. - Use the Reference browse window to select a Time Profile, Forecast, or point for which Historic is enabled. The item can reside anywhere on your system.
- Use the Date field to define the starting date from which you want to import the data.
With a Daily Time Profile Period, use the field to define the 24-hour period for which data is to be imported. The latest date you can specify is the current day.
With a Weekly Time Profile Period, use the field to define the starting date for which data is to be imported. ClearSCADA will use this Date to ascertain which data it needs to import for the day of the week that is selected on the Time Profile window. So, for instance, if data is to be imported for a Tuesday and the specified Date is for a Tuesday or earlier day of the week, ClearSCADA will import the data for the Tuesday in the week beginning with the specified Date. However, if the specified Date is for a Wednesday or later day of the week, ClearSCADA will import the data for the Tuesday in the week following the specified Date. The latest date you can specify is the start of the current week (Sunday being deemed the start of a week).
(For information on specifying a Time Profile’s Period, see Specify the Profile’s General Properties.)
- Ensure that the Generate Curve check box is clear.
The other fields within the Distribution section of the window are unavailable for use. - Select the OK button.
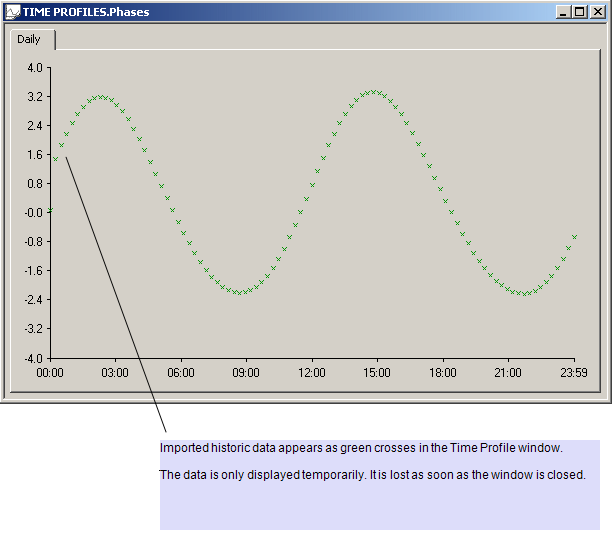
The Import Historic Data window is closed, and the historic data for the specified period is temporarily displayed in the Time Profile window. - Manually add vectors to produce the profile that you require, using the historic data as a guide (see Add a Vector).
- If the Time Profile has a Weekly span, repeat the above steps for any other day of the week for which the profile is to be based on historic data.
The historic data indicators are only displayed temporarily, as a guide, while the window remains open.
If required, you can view different days on a Weekly Time Profile. ClearSCADA will display the indicators for the day for which historic data has been imported whenever you return to the tab for that day, providing the window remains open.
With any Time Profile, the indicators are lost as soon as the Time Profile window is closed.
Example:
This example shows temporarily imported data in a Time Profile window. The data can be used as a guide when manually adding vectors to produce a profile based on that historic data.
