ClearSCADA supports several types of Trend, including pre-configured Trends and ad-hoc Trends (see Trends). You can view and action the Trends on a WebX client.
To view and action a pre-configured Trend on a WebX client:, either:
- Locate and then select the Trend item in the Database Bar (see Browse your Database on a WebX Client).
or:
- Right-click on the Trend item in the Database Bar.
A context-sensitive menu is displayed. - Select the 'Display Trend' option.
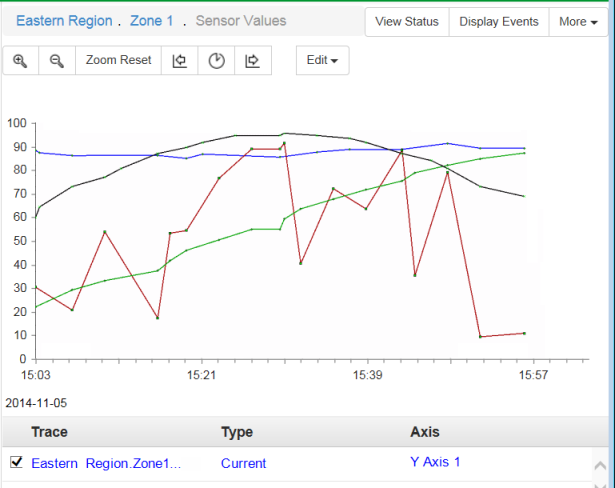
The Trend is displayed

The context-sensitive menu that appears to the top right of some Trend displays is only available on pre-configured Trend database items (as opposed to ad-hoc Trends).
To display a ‘standard’ ad hoc Trend on a WebX client, perform one of the following:
- Right-click on the required point or master station Accumulator entry in the Database Bar (see Browse your Database on a WebX Client).
A context-sensitive menu is displayed. - To display a Trend of current data, select the Display Current Trend option.
To display a Trend of historic data (if historic is enabled), select the Display Historic Trend option.
or:
- Locate and select the required point or master station Accumulator entry in the Database Bar (see Browse your Database on a WebX Client).
The item's Status display is shown in the document display area. - Select the More button on the context-sensitive menu that is shown to the top-right of the document display area.
- To display a Trend of current data, select the Display Current Trend option.
To display a Trend of historic data (if historic is enabled), select the Display Historic Trend option.
or:
- Display a suitable List, such as a Points List (see View and Action Lists on a WebX Client).
- Right-click on the entry for which you want to display a ‘standard’ ad hoc Trend.
A context-sensitive menu is displayed. - To display a Trend of current data, select the Display Current Trend option.
To display a Trend of historic data (if historic is enabled), select the Display Historic Trend option.
or:
- Display a suitable Mimic (see View a Mimic on a WebX Client).
- Select the item for which you want to display a ‘standard’ ad hoc Trend. (The item has to be configured to display a context-sensitive menu that includes the relevant menu option(s).)
- To display a Trend of current data, select the Display Current Trend option.
To display a Trend of historic data (if historic is enabled), select the Display Historic Trend option.
The Trend is displayed. If the Trend plots current data, it will show values from the time that the Trend was displayed.
If required, users with the relevant permissions can add ‘custom’ ad hoc Trends to ClearSCADA. You typically display a ‘custom’ ad hoc Trend by selecting a suitably configured button or hyperlink on a Mimic (see Use Custom Hyperlinks on a Mimic on a WebX Client). You can also use the Links Bar to access any 'custom' ad hoc Trends that are stored as Favorites (see Links Bar).
The way you interact with a Trend in WebX differs slightly to that of ViewX.
The Trend menu to the top-left of the document display area provides access to options that enable you to interact with the Trend display:

- Zoom In—Use this option to decrease the amount of time shown on the x-axis, so that you can view the differences in trace values more closely. The option is equivalent to the Zoom In option that is available for Trends on ViewX clients. For more information, see Zooming In and Out on a Trend.
- Zoom Out—Use this option to increase the amount of time shown on the x-axis, so that you can see more trace values (but in less detail). The option is equivalent to the Zoom Out option that is available for Trends on ViewX clients. For more information, see Zooming In and Out on a Trend.
- Zoom Reset—If you have used the Zoom In or Zoom Out options on a Trend, select the Zoom Reset option if you want to revert the zoom level back to its default setting.
- Previous Interval—Use this option to view Trend data for the time interval prior to the currently displayed interval. The option is equivalent to the Previous Interval option that is available for Trends on ViewX clients. For more information, see Previous Interval and Next Interval.
- Go To Interval—Select this option to display the Go to Time dialog box. Use the Interval Start field to specify the date and time from which you want the Trend to display data.
- Next Interval—Use this option to view Trend data for the time interval after to the currently displayed interval. The option is equivalent to the Next Interval option that is available for Trends on ViewX clients. For more information, see Previous Interval and Next Interval.
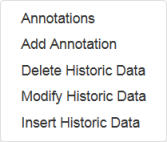
The Edit menu provides access to further options to which your user account has permissions.

Again, the options are equivalent to the similarly named options to which your user account provides access when viewing Trends on a ViewX client. For more information, see Using Trends.
Trace-specific options are available when you right-click on an entry in the Trend's key (to the bottom of the Trend display). The options vary, depending on the permissions that are assigned to your user account, and the current Trace settings:

The options are equivalent to those that are available when you view a Trend on a ViewX client. Once you opt to hide a feature, you are offered a 'Show <feature>' option in place of the 'Hide <feature>' option. For more information, see Using Trends.
With pre-configured Trends, a context-sensitive menu is displayed to the top-right of the document display area. Use the menu options to perform activities specific to the Trend database item (as opposed to the actual Trend display). For more information, see Access Context-Sensitive Menu Options on a WebX Client.
