To add any type of field to a report:
- View your report on the Design tab of the Crystal Reports application (or, in the case of a subreport, the relevant subreport tab).
- Check that the Field Explorer Bar is displayed. (If the Bar is not displayed, select the View menu, followed by the Field Explorer option.)
- Within the Field Explorer Bar, expand the tree-structure for the type of field that you want to add to the report (see Field Types).
- Drag the required field from the Field Explorer Bar onto the report.
- Format the field as required.
Example:
A simple report is required, which displays each of the SCADAPack Modbus points on a ClearSCADA system.
The CSCADAPackMPoint table is used for the report.
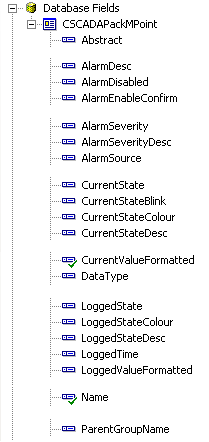
To add fields to the report, the Database Fields entry is expanded in the Field Explorer Bar, so that it shows the fields that are available in the CSCADAPackMPoint table.

The Name and CurrentValueFormatted fields are dragged onto the Details area of the report. This results in a report that includes the name of each point and the current point value.
.png)
For a field that is to display data for every entry in the report, place the field in the Details section of the report.
For fields that are only to appear at the start or end of a report, or in the header or footer of each page of a report, place the field in the appropriate section of the report (see Understand the Crystal Reports Work Areas).
Bear in mind that for those export options that treat fields as records, you should only include data fields in a report. Such export processes will export multiple copies of any headers, footers, and field titles, and so on, as each of the report fields are treated as records. To check if this applies to the export format that you want to use on a report, see Define the Export Format for a Report and go to the section on that export format.