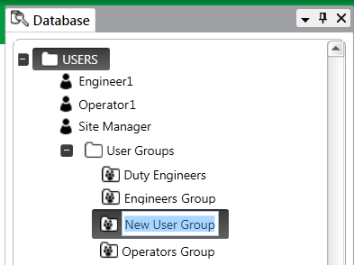
If several user accounts on your system require the same access permissions, you should associate them with a User Group. You can then allocate permissions to all of the user accounts associated with the User Group at once (rather than allocate permissions to each account individually).
You can associate user accounts with more than one User Group.
When a user logs on via a user account that is a 'member' of a User Group, that user is granted:
- The permissions of the ‘Everyone’ User Group
- The permissions of the user account
- The permissions of the User Group(s) of which the user account is a member
- 'Responsibility' for any geographical regions that are assigned to the user account
- 'Responsibility' for any geographical regions that are assigned to the User Group(s) of which the user account is a member
- Access to any Operator Document Stores that are associated with the user account
- Access to any Operator Document Stores that are associated with the User Group(s) of which the user account is a member.
NOTE: To create a User Group, you have to log on with a user account that has the Configure and Security permissions for the Group that is to contain the User Group item (see Permissions for Working with User Accounts and User Groups).
To create a User Group:
- Display the Database Bar (see Display an Explorer Bar).
- In the Database Bar, right-click on the Group or system that is to contain the User Group.
A context sensitive menu is displayed. - Select the Create New option, followed by the Security option, and then the User Group option.
A new User Group is created. It is selected automatically, ready for you to define its name.
- Enter a suitable name for the item (taking into account the ClearSCADA Naming Restrictions). We recommend that the name should be indicative of the types of user accounts with which the User Group will be associated.
- Several of the tabs on the User Group Form are common to many database items:
- Identification—Use to optionally define a Help View and to indicate whether the item is to be excluded from any Exclusive Control activity (see Defining Identification Details).
Location—Use to specify the item's geographical coordinates. (You need only configure the properties on this tab if your system uses ClearSCADA's Geographical Location features.)
- User Methods—Use to define any custom pick actions (‘methods’) for the item (see Using the User Methods Tab to Define Custom Actions).
- Use the Regions tab to Assign Regions of Responsibility to the users in the User Group. (You need only configure the properties on this tab if your system uses ClearSCADA's Geographical Location features.)
- Use the User Group tab to:
- Once you have configured the User Group, you will need to define its access permissions. You can define the access permissions for any User Group including the 'Everyone' User Group, on the Security window for each database item. For more information, see Allocating Security Permissions.NOTICE
SECURITY THREAT
On systems on which ClearSCADA can Create users automatically from group membership, the incorrect assignment of security permissions on User Patterns and User Groups can compromise the security of the system. Always restrict the security permissions that are allocated to User Patterns, and to User Groups that are integrated with Windows domain groups or LDAP user groups. Only assign those permissions that are actually required, to help prevent the automatic creation of new user accounts that allow Windows or LDAP users to perform high-level tasks, such as shutting down the server.Failure to follow these instructions can result in equipment damage.
You have now created a User Group. You can associate the User Group with the relevant user accounts on your system (see Associate a User with a User Group).
You can move, rename, copy or delete the User Group in the same way as you would move, rename, copy or delete any other type of database item. To do this, you will need to log on via a user account that has both the Configure and Security permissions for the Group that contains the new User Group. Similarly, if you import a User Group database item, you need to log on via an account that has Configure and Security permissions for the Group that is to contain the imported User Group.
For more information on renaming, copying, deleting, moving and importing database items, see Organizing and Configuring Your Database in the ClearSCADA Guide to Core Configuration.