You can associate each archive with a schedule so that data is archived automatically on a regular basis. This helps to ensure that the data on your system is archived regularly.
LOSS OF DATA
Online data is deleted at the end of the last week of the duration it was set to be retained. If you perform a manual archive close to the time (midnight) of the last day of the last week, there may not be sufficient time for the archive to complete before the data is deleted.
The last day of the week is defined as Sunday as described in ISO 8601.
You can also use the same schedule with multiple archives, for example, you can use the same schedule for archiving the data of each of your servers.
To archive data according to a schedule:
- Display the Database Bar (see Display an Explorer Bar).
- Create and configure an archive item (see Create and Configure Archive Items).
Make sure that the archive volume is in place and can be accessed by ClearSCADA. To archive data, ClearSCADA will need to be able to write to the volume. If the volume has not already been mounted, ClearSCADA will mount the volume automatically prior to writing the archive data.
- Create and configure a schedule item, (see Add a Schedule in the ClearSCADA Guide to Core Configuration).
- Configure the basic schedule properties as required (see Define the Basic Schedule Properties in the ClearSCADA Guide to Core Configuration), and then save the configuration.
- In the Database Bar, right-click on the Schedule
A context-sensitive menu is displayed. - Select the Edit Schedule option to display the Schedule Editor window.

- Select and drag the required archive item from the Database Bar into the Action area of the Schedule Editor.
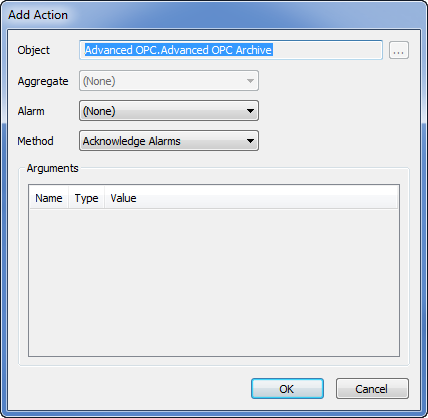
The Add Action window is displayed.
- Use the Method combo box to select the Archive option, and then select the OK button to confirm your selection and close the Add Action window.
The archive is added to the list of actions.
- Double-click on the time-line at the position that represents the time at which the archive operation will begin.
A marker is displayed—it indicates the time at which the actions in the list of actions will occur.
- Repeat steps 7 and 9 for each archive that is to occur at the times at which markers are positioned on the time-line. You can add multiple markers to trigger archiving several times per schedule.
You can drag a marker to a different time, or you can double-click on it to remove it.
- Save the configuration (see Saving Configuration Changes in the ClearSCADA Guide to Core Configuration).
The archive(s) will occur at the times defined in the schedule.
Further Information
Using Schedules to Automate Regular Functions in the ClearSCADA Guide to Core Configuration.