This section applies to Schedules other than Simple Schedules.
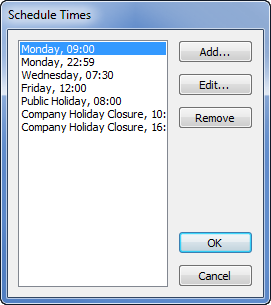
You generally add event(s) to a Schedule by adding those events directly to the Schedule Display (see Add an Event Directly to a Schedule). However, you can also add events to a Schedule by using the Add button on the Schedule Times window.
To add an event to a Schedule by using the Schedule Times window:
- Display the Schedule Times Window.

(The Format in which Schedule Times are Displayed varies, depending on the type of Schedule.)
- Select the Add button.
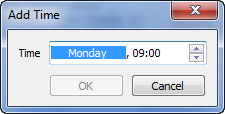
The Add Time window is displayed, with the first element of the time or date highlighted.
- If the entry includes a day, month, or Calendar day type, use the Up and Down arrow keys on your keyboard to cycle through the available options and select the required entry.
- Select the first time element (for instance the hour) and either overwrite the time with the required time, or use the field’s arrows to select the required time.
- Repeat step 4 for any other time element(s) (such as minutes).
- Select the OK button to add the new time to the Schedule Times window.
- Repeat steps 2 to 6 for any other times that you want to add to the window.
- Select the OK button on the Schedule Times window to add the event times to the Schedule.
- Save the configuration.