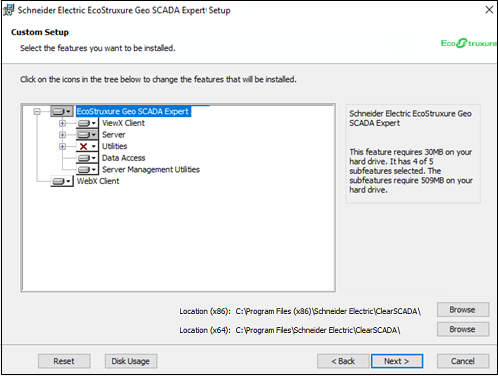
You can select the components that you want to install on the server and clients on your system; to do this, you use the Custom Setup page. On a clean installation, this page is displayed when you choose Custom on the Choose Setup Type page. When installing an upgrade of Geo SCADA Expert, this page is displayed if you select the Change button on the Upgrade page.
The Custom Setup page only offers server components on Server and Server and Clients installations. With such installations, you have to install the Local Web Proxy Part 1/2 (IIS) and Local Web Proxy Part 2/2 (ARR) prerequisites (see Geo SCADA Expert Prerequisite Components). If these prerequisites are required, but have not yet been installed, use the Back button on the Installation Wizard pages to go back to the Setup page and select the required prerequisites from that page.

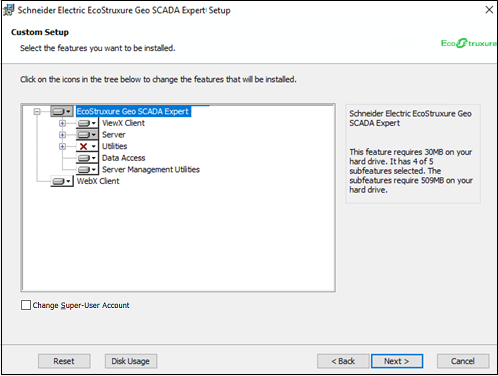
The Custom Setup page is also displayed when you select the Modify button in order to make changes to an existing installation, The page layout differs slightly in that case, in that it includes a Change Super-User Account check box:

Use the hierarchical tree on the left-hand side of the page to choose which components are installed. The branches that are shaded gray can be expanded to reveal a series of components, which you can then include or exclude from the installation as required.

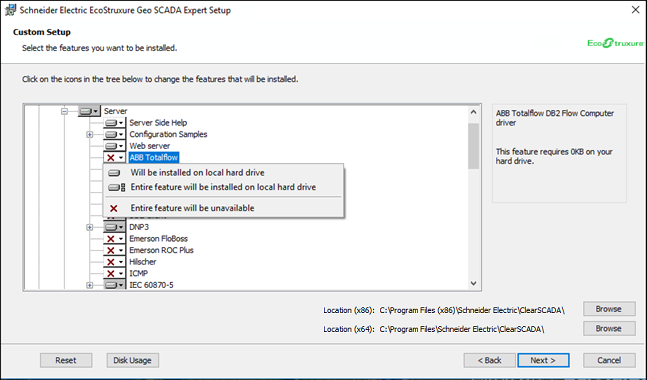
Use the plus and minus icons to expand and collapse the tree as required. To include or exclude a component (or entire collection of components), right-click on the branch or individual component and choose from these options:
- Will be installed on local hard drive—The selected component will be installed. If the component has sub-components, only those that are also selected will be installed.
- Entire feature will be installed on local hard drive—The selected component and all of its sub-components will be installed.
- Entire feature will be unavailable—The component will not be installed.
You can also use the Choose Setup Type page to define where the chosen components will be installed. The 64-bit components are installed to the directory indicated for Location (x64) and 32-bit components are installed to the directory shown for Location (x86). You can use the Browse buttons next to each Location to specify a different location if required.
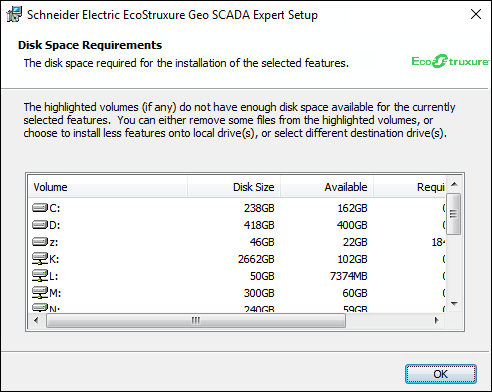
For information on the amount of disk space required for the installation you have chosen, select the Disk Usage button. This displays the Disk Space Requirements window, which shows any volumes that have insufficient space available.

When you have selected the components you want to install:
-
If this is a clean installation of Geo SCADA Expert, select the Next button to proceed to Create a Super User Account.
-
If you are upgrading an existing installation of Geo SCADA Expert, select the Next button to proceed to Ready to Install.
-
If you are modifying an existing installation of Geo SCADA Expert, and the Change Super-User Account check box is left clear, select the Next button to proceed to Ready to Install.
-
If you are modifying an existing installation of Geo SCADA Expert, and have selected the Change Super-User Account check box, select the Next button to proceed to the Super User Account page. Use that page to set up or modify the Super User account settings.
Further Information
Making Changes to your Geo SCADA Expert Installation.
Specify the Geo SCADA Expert installation components that are required to enable access to the Geo SCADA Expert database from mobile devices: see the separate Geo SCADA Mobile documentation suite. (This includes information about the Mobile Companion component.)