On systems on which ClearSCADA is configured to Create users automatically from group membership, you configure the initial settings on the User Pattern Form, rather than the User Form.
Each user account has its own configuration Form that you can use to define the settings for the user account.
To display the User Form:
- Display the Database Bar (see Display an Explorer Bar).
- Right-click on the User item for which you want to configure the User Account properties.
A context-sensitive menu is displayed. - Select the Edit Properties option.
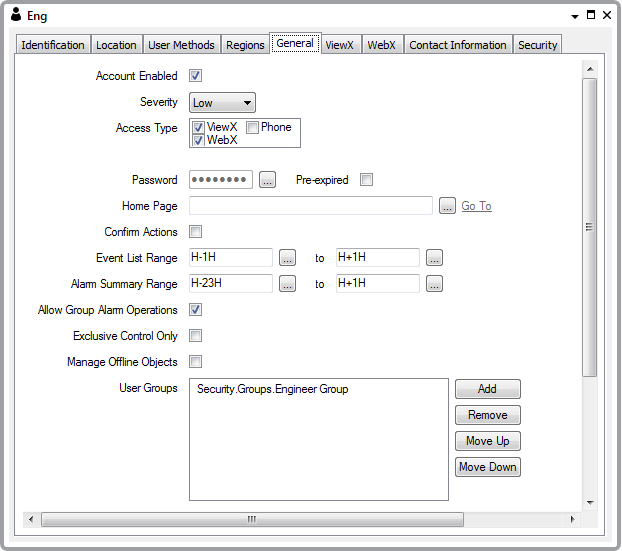
The User Form is displayed.
(For other means of displaying a Form, see Display a Form in the ClearSCADA Guide to Core Configuration.)
The User Form consists of several tabs, each of which contains groups of settings. Several of the tabs are common to many database items:
- Identification—Use to optionally define a Help View and to indicate whether the item is to be excluded from any Exclusive Control activity (see Defining Identification Details).
- Location—Use to specify the item's geographical coordinates. (You need only configure the properties on this tab if your system uses ClearSCADA's Geographical Location features.)
- User Methods—Use to define any custom pick actions (‘methods’) for the item (see Using the User Methods Tab to Define Custom Actions).
The Regions, General, ViewX, WebX, Contact Information and Security tabs contain settings that are specific to Users. For more information, see the topics that are listed in the gray footer section at the bottom of this topic. Select the relevant entry to display the topic that you require. For information about the Regions tab, see Assign Regions of Responsibility. (You need only configure the properties on this tab if your system uses ClearSCADA's Geographical Location features.)
Some User configuration settings are optional - you do not need to configure every setting for a User account to function.
The settings on the Security tab only apply to User accounts that are managed directly in ClearSCADA. With User Accounts that are associated with Windows or LDAP User Profiles, password management is performed via the relevant Windows domain or LDAP server.
When you have finished defining the settings for the user account, you need to store the changes. You do this by saving the configuration (see Saving Configuration Changes in the ClearSCADA Guide to Core Configuration).
Further Information