The Miscellaneous section of the General tab in the Options window allows you configure various settings that define how the user interface behaves within ViewX.
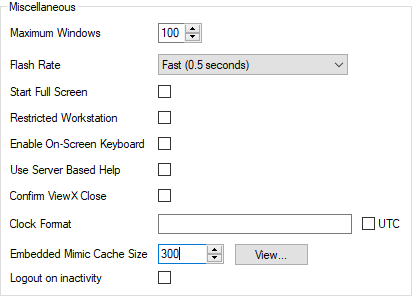
The changes you make to the following Miscellaneous settings will only take effect on the ViewX client on which you make the changes:
You can use this option to set a limit for the number of ViewX document windows that can be open at the same time. For example, if you set the limit to 3, any user that logs on to the client will only be able to display three document windows at the same time. If the user tries to display additional documents, a message is displayed informing the user that they need to close a document before the new document can be displayed.
ViewX documents are visual displays such as Mimics, Trends, X-Y Plots, Logic programs, and so on.
To define the maximum number of ViewX document windows that can be displayed simultaneously on the client, use the Maximum Windows spin-box to set the maximum amount. You can use a value from 1 to 100. The default value is 100.
NOTE: The text '(Overridden by startup configuration)' appears alongside a property when that property is unavailable for configuration via the Options window. The text is displayed when the ViewX client is configured to run on a Multi-Monitor setup for which the Startup Configuration File determines the value of that property.
If you attempt to open an additional document window when the maximum number has been reached, the following notification will appear.
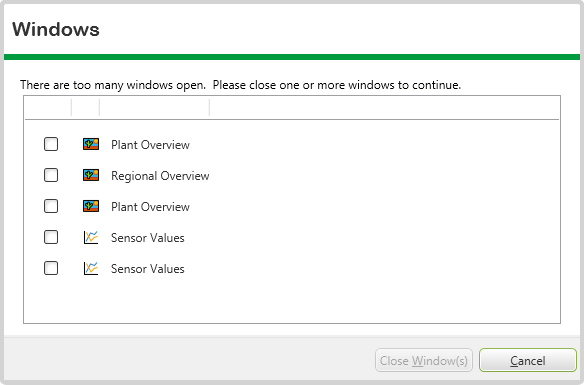
To continue, place a check mark next to the document window(s) you would like to close, then select Close Window(s).
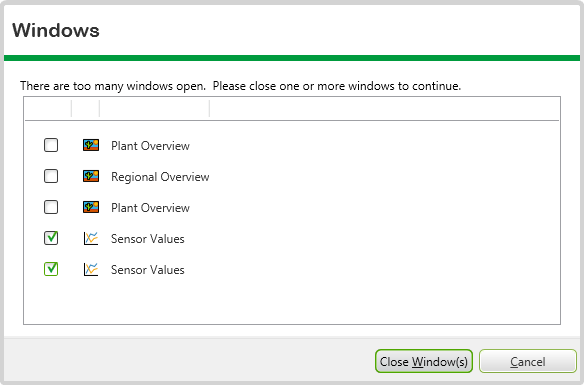
If any of the selected document windows include unsaved configuration changes, you will be prompted to save the changes.
If you select Cancel instead of Close Window(s), the document window you attempted to open will not display.
Many ViewX documents have flashing elements on display. For example, Mimics can contain flashing objects and Lists and the Alarm Banner can both show flashing entries (these entries usually relate to items in alarm). The flashing elements are designed to attract the attention of operators so that they are made aware of site conditions as soon as possible.
The speed at which the elements flash between colors is defined via the Flash Rate setting on the Options window. This setting determines whether the colors flash Fast (change every 0.5 seconds, Medium (change every 0.75 seconds), or Slow (change every second).
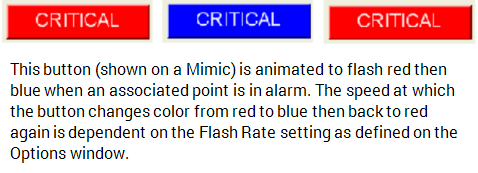
Typically, you would set the Flash Rate setting according to your personal preference. However, on some systems, performance may be affected by the Flash Rate setting—if your PC has limited graphics hardware, fast and possibly medium Flash Rate settings may cause additional CPU usage. For this reason, we recommend that you choose the Slow Flash Rate setting on PCs with limited graphics capabilities.
Mimic objects that have their Flash Mode property animated are also affected by the Flash Rate setting - it affects the speed of the animation. For example, if a Mimic object is animated to use the 2 color fast flashing effect and the Flash Rate setting is Slow, the speed of the 2 color fast flashing effect will be slower than when the Flash Rate is set to Medium or Fast.
To change the Flash Rate setting that is used for flashing effects on your ViewX client, use the Flash Rate combo box to set the amount of time between each stage in the flash sequence. You can choose from:
- Fast (0.5 seconds)—Each stage of the flash sequence will last 0.5 seconds. For example, if a Mimic object is to flash between red and blue, it will be red for 0.5 seconds then blue for 0.5 seconds and will repeat this pattern.
- Medium (0.75 seconds)—Each stage of the flash sequence will last 0.75 seconds.
- Slow (1 second)—Each stage of the flash sequence will last 1 second. This is the recommended setting for ViewX clients that have limited graphics hardware.
You can set a client PC to display ViewX in full screen mode. Full screen mode is particularly useful when the client PC is primarily used for interacting with ClearSCADA, as it means ViewX always starts at its maximum size.
When ViewX launches in full screen mode, the following occurs:
- The ViewX title bar does not display
- The ribbon is minimized (see Minimize the Ribbon)
- The Quick Access Toolbar is hidden
- The File Menu button displays at a reduced size
- The Status Bar does not display
- The Minimize, Maximize, Restore and Close buttons do not display
- ViewX extends over the Windows taskbar.
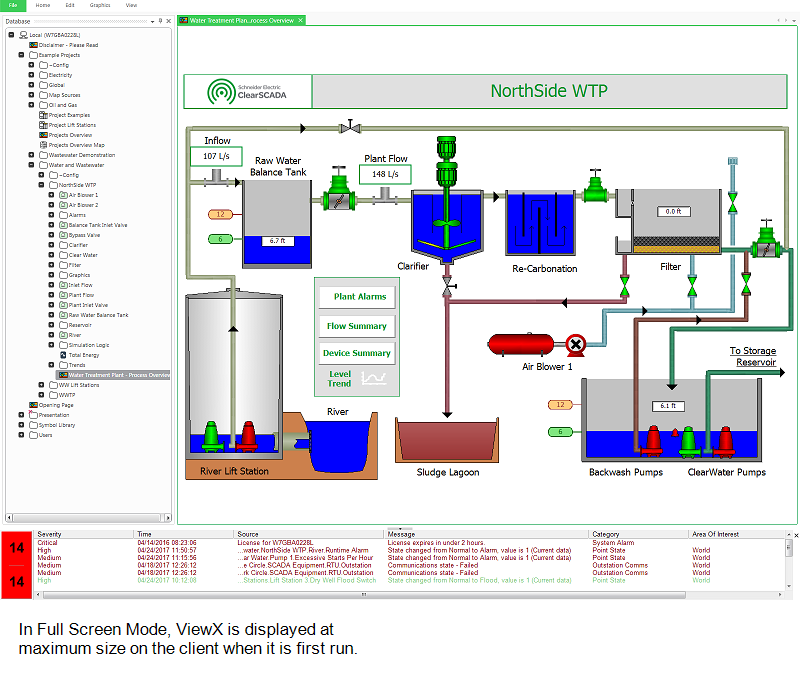
To enable or disable full screen mode select the Start Full Screen check box to enable full screen mode or clear the check box to disable full screen mode.
NOTE: The text '(Overridden by startup configuration)' appears alongside a property when that property is unavailable for configuration via the Options window. The text is displayed when the ViewX client is configured to run on a Multi-Monitor setup for which the Startup Configuration File determines the value of that property.
Full screen mode only affects how ViewX is displayed when it first runs. If the current user has Can Toggle Full Screen enabled in their User settings (see Define the General Settings for a User in ViewX in the ClearSCADA Guide to Security), they can turn off full screen mode. To do this:
- Select Full Screen from the Window command group on View tab.
Or:
- Use the F11 shortcut key.
The full screen mode should not be confused with the restricted workstation feature described below, which works in conjunction with UI lockdown functionality in Windows to restrict users to only accessing ViewX on that particular client PC.
Further Information
Multi-Monitor setup: Launch a Window Container in Full Screen Mode
ClearSCADA's Restricted Workstation feature is designed to be used in conjunction with UI lockdown functionality in Windows®. For example, it might be the policy on your site to restrict workstation functionality, such that non-administrator-level users are prevented from shutting down the workstation, accessing the task manager, and so on. If the settings in Windows have been used to restrict workstation functionality for non-administrator-level users, you can select the Restricted Workstation check box to enforce the following rules:
- Run ViewX in full screen mode
- Prevent ViewX from being closed unless the ‘Can Close ViewX’ feature is enabled for the Guest user or the user account that is used to log on (see Define the General Settings for a User in ViewX)
- Prevent users from resizing the ViewX window.
Clear the Restricted Workstation check box to set the ViewX client to function as a normal, unrestricted workstation. Leave the check box clear, for example, on workstations on which operating functionality in Windows is not locked down for non-administrator-level users.
You can interact with ViewX from devices that do not have a keyboard such as touch-screen displays. This is made possible by ViewX’s own on-screen keyboard feature which provides users with a virtual keyboard - they can select letters, numbers, and so on, on the on-screen keyboard instead of using a physical keyboard.
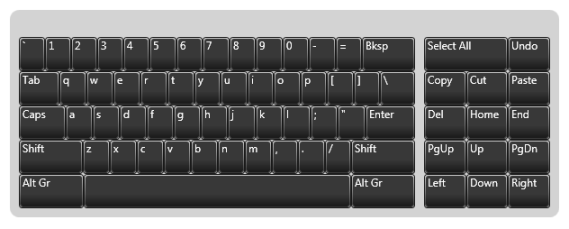
By default, ViewX’s on-screen keyboard is disabled and you have to interact with ViewX by using a keyboard and mouse.
To enable or disable ViewX’s on-screen keyboard, select the Enable On-Screen Keyboard check box to make the on-screen keyboard available for relevant displays. You can now interact with ViewX via devices that do not have physical keyboards.
The keyboard layout varies, depending on the user's Locale settings (see Define the Regional Settings for a User).
Clear the Enable On-Screen Keyboard check box to disable the on-screen keyboard feature. You will need to use a physical keyboard to interact with ViewX.
Further Information
Numeric Touch Screen Pad: see Use the Numeric Touch Screen Keypad.
Alphanumeric Touch Screen Keyboard: see Use the Alphanumeric Touch Screen Keyboard.
Whenever you are using ClearSCADA, and you don't understand a feature, concept, or setting, you can get online help by:
- Pressing the F1 function key
- Selecting Help>Contents from the main menu.
For more information about using ClearSCADA online help see Welcome to ClearSCADA Help.
ClearSCADA stores online help both on your local ViewX client and on the ClearSCADA servers to which your ViewX client is connected. When you request online help, the default setting is that ViewX displays the local version of online help.
The local version of online help could be different to versions on the ClearSCADA servers. For example, this might happen if you are using an old version of ViewX. In such a case, the local version of online help might not be synchronized with server-based ClearSCADA database items. That is, the online help might not match the ClearSCADA screens that you see and the context-sensitive (F1) online help might not work as you expect.
To ensure that the ViewX online help is fully synchronized with server-based ClearSCADA database items, you can specify that ViewX should use Server-Side Help.
ViewX can only use Server-Side Help if ALL of the servers to which your ViewX client is connected have Server-Side Help installed. The Server-Side Help component is in the following folder: C:\Program Files\Schneider Electric\ClearSCADA\WWW\Help.
If your network has speed restrictions, or is bandwidth limited, you may not want to enable Server-Side Help.
To specify that ViewX should use Server-Side Help select the Use Server Based Help check box.
The setting only affects the ViewX client that you use to make the setting.
You can use the ViewX Options window to determine if confirmation is required when the ViewX client closes. If the Confirm ViewX Close option is selected, a confirmation dialog is displayed when a shutdown is attempted.
Clear the check box to allow ViewX to close without confirmation.
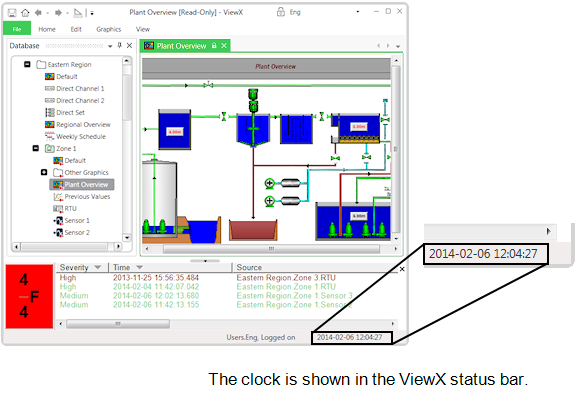
You can add a clock to the status bar on a ViewX client. The clock can display times in UTC or local time and it takes the time from the Windows operating system (with any formatting applied before it added to the status bar).
The ViewX status bar clock is particularly useful on ViewX clients that are set to display in Full Screen mode, where the Windows taskbar clock cannot be seen.
To add a clock to the status bar on a ViewX client, enter the format for the time setting in the Clock Format field. The format has to comply with the ClearSCADA time format (see Using OPC Time Formats). If you leave the field empty, the clock will not be displayed.

Select the UTC check box to set the clock to display the time in Coordinated Universal Time (UTC) or clear it to display local time.
If you display a Mimic that contains an embedded Mimic, the embedded Mimic is loaded into memory on the client PC (into an area called the embedded Mimic cache). The file for the embedded Mimic can then be accessed locally by any Mimic that contains the embedded Mimic.
You can define the maximum number of embedded mimics that are held in the cache. When you display a Mimic that contains embedded Mimics, the embedded Mimics are stored in the embedded Mimic cache. To help minimize potential loss of performance, ClearSCADA attempts to remove unused embedded Mimics from the cache if the number of cached embedded mimics reaches or exceeds the defined cache size. When the limit is reached or exceeded, ClearSCADA removes the embedded Mimic files for any embedded Mimics that are not currently on in use, starting with the oldest files first.
ClearSCADA can only remove the files for embedded Mimics that are not currently being displayed on Mimics. High memory usage performance issues can occur when the embedded Mimic cache is full and ClearSCADA cannot remove any embedded Mimic files as they are in use, the Mimics on display may take a long time to load and respond.
Example:
A Mimic named ‘Pipeline’ contains an embedded Mimic called ‘Tank 1’. A user logs on to a client named ‘VC1’ and displays the ‘Pipeline’ Mimic. The ‘Pipeline’ Mimic is loaded and the embedded ‘Tank 1’ Mimic is stored in the embedded Mimic cache.

The user then displays a Mimic named ‘Section A’. The ‘Section A’ Mimic also contains an embedded version of the ‘Tank 1’ Mimic. To maximize performance and efficiency, the ‘Section A’ Mimic loads the ‘Tank 1’ Mimic from the embedded Mimic cache rather than loading the ‘Tank 1’ Mimic from the server. This means that both the ‘Pipeline’ and ‘Section A’ Mimics use the same local file for the embedded ‘Tank 1’ Mimic instead of loading separate versions of the file from the server.
We recommend that you only change the embedded cache size if specifically advised to do so by a Schneider Electric engineer.
When making changes to the size of the embedded Mimic cache, you can examine the effects by using the View feature for the embedded Mimic (available on the Options window). This allows you to see how many embedded Mimic files are being loaded in and out of the cache.
If you have been advised to change the embedded Mimic cache size, you will need to use the Options window to make the alterations, use the Embedded Mimic Cache Size spin-box to increase the cache size as advised.
You can view information about the embedded Mimic cache by selecting the View button that is next to the spin-box. This displays the Embedded Mimic Cache window which provides the following information:
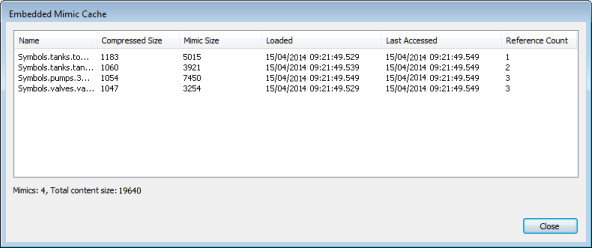
The name of the embedded Mimic. The name includes the parent Group.
The size of the embedded Mimic file as stored in the ClearSCADA database. When stored in the database, files are compressed so that they are smaller and the database can store greater numbers of files.
The size of the embedded Mimic file before it is compressed. The size of the embedded Mimic file will be larger than both the Compressed Size and the Mimic Size when it is loaded into memory as there is additional processing involved.
The date and time that the embedded Mimic file was last added to the cache.
The data and time that the embedded Mimic file was last used on a Mimic on display.
The number of times the embedded Mimic file is displayed on the Mimics that are currently open on the client PC.
The Miscellaneous section of the ViewX Options provides you with a Logout on Inactivity option. This option allows you to enable the system to automatically logout if the Inactivity Logout time has been configured and when the system is inactive and there are no open documents with pending changes.
Select the Logout on Inactivity check box to enable the system to logout automatically when the system is inactive for the time configured in the default security settings. Clear the Logout on Inactivity check box to disable the option.

This example illustrates the basic relationship between all the inactivity functions.

The system does not logout automatically if there are any open documents with pending changes. If this occurs the system prompts you to log off when the system is inactive for the time configured in the default security settings. When you log off you are prompted to save any open document, see Log Off from ViewX.
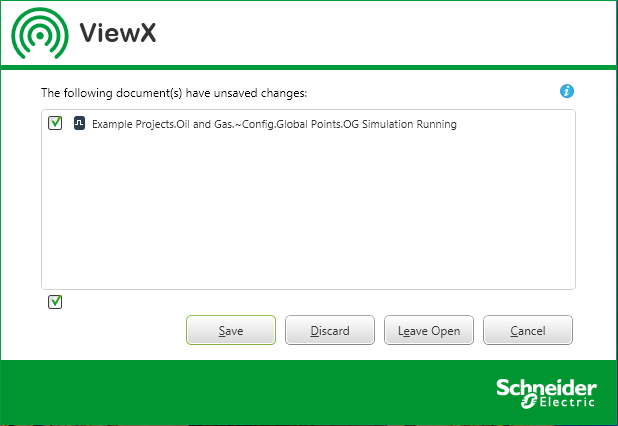
The Logout on Activity check box is clear by default. If you leave it clear the system prompts you to logout when the system is inactive for the time configured in the default security settings.