You can create single-layer maps or multi-layer composite maps in ClearSCADA, from online or offline mapping sources, which you can then use for a variety of purposes. For example, you can display:
- The geographic location of items in the ClearSCADA database
- Geographic information, such as weather data.
This topic provides an example of how you can create a multi-layered map in ClearSCADA. To demonstrate the principles of putting together such a map, we will create a weather map of the UK using open sources and two of the standard base layers supported by ClearSCADA.
The map will look like this:
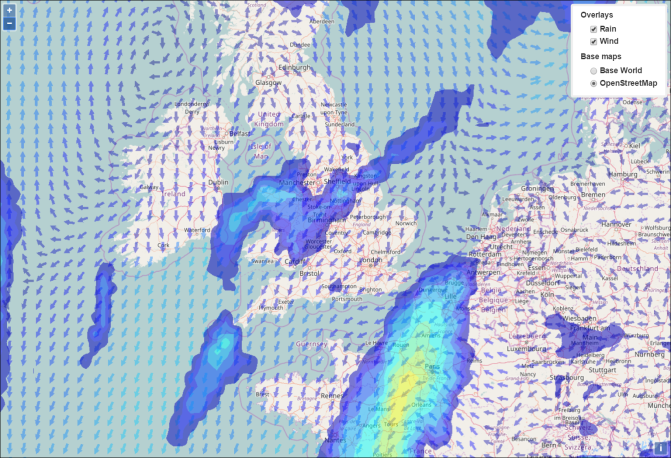
Note that the map has a Layer menu in the top right-hand corner which provides users with a choice of four layers to display: two base layers (an OpenStreetMap® base layer, and an ArcGis® Base World base layer) and two overlays showing wind and rain data. For more about layers, see About ClearSCADA Maps. In the illustration above, the OpenStreetMap base layer is displayed as well as the Wind and Rain overlays.
The procedure to create the map is as follows:
- The first step is to specify a source for each of the map layers. To do this, you create a Map Source database item for each layer. The source can be an online or offline mapping source, but in this case the sources are all online (for a list of sources currently supported by ClearSCADA, see Which Map Sources does ClearSCADA Support?).
We will specify the OpenSteetMap layer first. To do this, you create a Map Source database item (see Creating a Map Source) and set the name of the database item to OpenStreetMap:

- The next step is to configure this Map Source (see Configuring a Map Source).
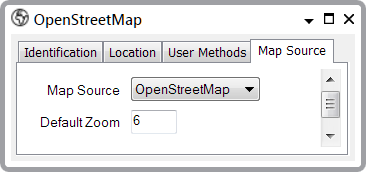
We will set the Map Source to OpenStreetMap and the Default Zoom to 6, which will give the right amount of map detail for the base layer (for more information about the fields, see OpenStreetMap (OSM) Map Source).
We have now created and configured the OpenStreetMap Map Source.
-
Next, we will specify the source of the ArcGIS Base World layer by creating another Map Source database item (see Creating a Map Source) which we will call Base World:

- Once again, we need to configure this database item (see Configuring a Map Source).
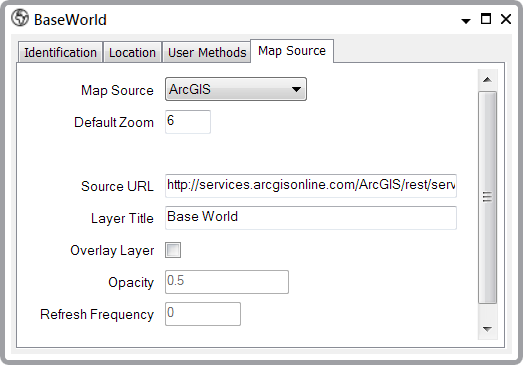
The settings are as follows:
- The Map Source is ArcGIS (for more information about the fields, see ArcGIS Map Source)
- The Default Zoom is 6 again
- The Source URL for the ArcGIS Base World map is: http://services.arcgisonline.com/ArcGIS/rest/services/World_Topo_Map/MapServer. This is the address of the map image on the ArcGIS server (note that this server is not controlled or supported by Schneider Electric)
- The Layer Title we will set to 'Base World', which will be the title on the Layer menu of the finished map
- The Overlay Layer check box is not selected because this is a base layer (if we were to select this box, we would be specifying that this is an overlay layer - which it isn't).
We have now set up the base layers, so we should save the configuration (see Saving Configuration Changes in the ClearSCADA Guide to Core Configuration) and move on to creating the overlay layers.
- There are two overlay layers, so we will create two Map Source database items, one for each layer (see Creating a Map Source) and name them Rain and Wind.

- Next, we will configure the two overlay Map Sources (see Configuring a Map Source).
First, the Wind layer:

The notable settings are as follows:
- The Map Source is WMS (for more information about the fields, see WMS Map Source)
- The Source Layer in this case is GDPS.ETA_UU. This specifies the map layer on the ArcGIS server that we want to display and forms a part of the overall URL of the map image
- The Overlay Layer check box is selected because this is as an overlay layer rather than a base layer
- Because this is an overlay, we need to set the Opacity of the layer. We have set it at 0.4, so that the detail in the overlay is clearly visible but the layer does not obscure the base layer detail
- The Refresh Frequency determines how often ClearSCADA will update the wind data. We have set the frequency to 15 minutes as this is probably sufficient.
- The Rain layer configuration looks like this:
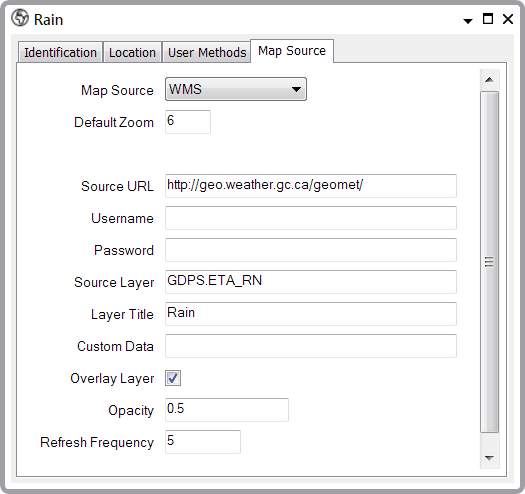
We have now created and configured all of the map layers, so we should save the configuration (see Saving Configuration Changes in the ClearSCADA Guide to Core Configuration) and move on to the next stage, which is to create a Map Set.
- The Map Set will define which layers are available in the finished map and which layer options are displayed in the map's Layer menu. The first step is to create a Map Set database item (see Creating a Map Set) and give it a suitable name - in this case UK Weather:

- Next, we will configure the Map Set database item:
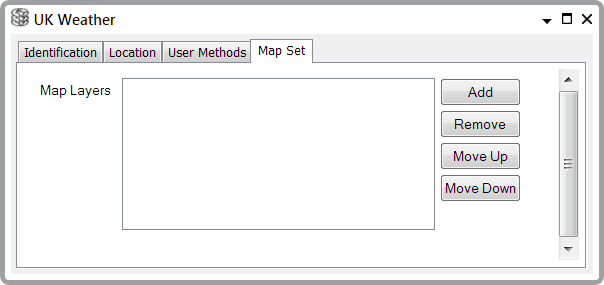
To do this, we need to Add to the Map Set the Map Sources that we have created (see Configuring a Map Set). The list of Map Sources will then appear in the Map Layers field. For example:
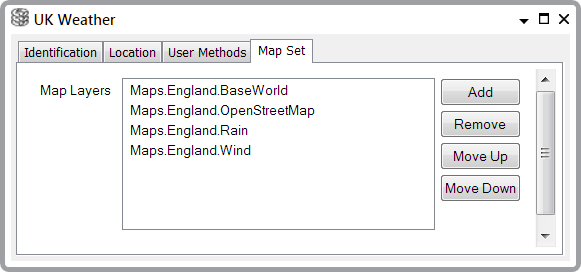
In this example, you would Add the Base World Map Source first and then the OpenStreetMap Map Source and so on (note that the Map Sources are in a Group called Maps.England in this example).
The Layer menu for the map will be as follows:
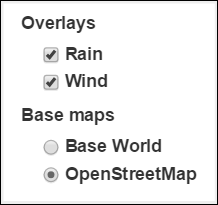
Note that the Map Sources are organized into categories - Base maps and Overlays.
The final step is to save the Map Set (see Saving Configuration Changes in the ClearSCADA Guide to Core Configuration) and then we have completed the procedure.
Users can now display the UK Weather map (see Displaying a ClearSCADA Map) and use it (see Using a ClearSCADA Map).